Category: Guides

  • How to Properly Add Signage To Your Fire Equipment for Quick Response

    How to Properly Add Signage To Your Fire Equipment for Quick Response

    Ensuring the safety of a building’s occupants is paramount. As a safety officer or facility manager, your role includes guaranteeing that fire equipment is correctly signposted to allow for swift response in an emergency.

    This blog post outlines six critical aspects of implementing effective fire equipment signs.

    Understanding Fire Equipment Signs

    Fire equipment signs are vital navigational aids during emergencies, guiding individuals to the necessary equipment swiftly and efficiently. These signs are not merely decorative but crucial to a building’s safety infrastructure.

    Recognising Symbols

    Symbols on fire equipment signs are designed to be easily identifiable. They highlight the location and type of equipment available, ensuring that even in high-stress situations, individuals can quickly understand where to go and what to do.

    • Fire Extinguishers: The symbol for fire extinguishers usually consists of a simple yet distinct icon of an extinguisher. This universally recognised symbol is crucial for quick identification and response. For enhanced visibility, consider using a Fire Extinguisher Projecting Sign.
    • Fire Hoses: The fire hose symbol typically features a hose reel, making it instantly recognisable. This symbol is essential for guiding individuals to the hose in a fire emergency. A Fire Hose Reel Projecting Sign can make this equipment even more noticeable.
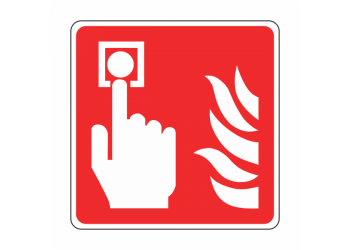
    • Fire Alarm Call Points: The fire alarm call points symbol is usually a hand pressing a button, indicating where the alarm can be activated. Quick identification of this symbol can be crucial in alerting the building’s occupants. Use a Fire Alarm Call Point Projecting Sign for better visibility.
    • Fire Escape Routes: The fire escape route symbol often features a running figure and an exit door, guiding individuals towards the safest exit path. This symbol is vital for ensuring a smooth evacuation process.

    Colour Coding

    The appropriate use of colours is crucial in creating noticeable and effective fire equipment signs. Colours attract attention and convey specific meanings that can aid in quick decision-making during emergencies.

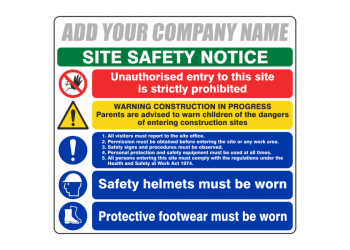
    • Red Backgrounds: A red background is commonly used for fire equipment signs as it is universally associated with alertness and caution. Red is easily noticeable, even from a distance, making it an ideal choice.
    • White Text and Symbols: White text and symbols on a red background offer a stark contrast, making the sign easily readable. This colour combination is standard for fire equipment signs and quickly conveys information.
    • Use of Fluorescent Colours: Fluorescent colours can make the sign more visible in low-light conditions. However, these should be used sparingly and in the proper context to avoid causing confusion.
    • Avoiding Colour Clashes: Avoiding colour clashes that could make the sign difficult to read. For instance, using similar shades for the background and text can reduce the sign’s effectiveness.

    Understanding fire equipment signs’ symbols and colour coding ensures quick and effective responses during emergencies.

    The Correct Placement of Fire Equipment Signs

    The correct placement of fire equipment signs is crucial for their effectiveness in guiding individuals during emergencies. Properly positioned signs can distinguish between a well-coordinated evacuation and a chaotic situation.

    This section delves into the various factors that influence the placement of fire equipment signs, such as height, visibility, and proximity to the equipment they denote.

    Height and Visibility

    Eye Level Placement

    Placing fire equipment signs at eye level is generally considered the best practice for maximum visibility.

    At this height, individuals easily notice and read the signs, ensuring that crucial information is quickly and clearly communicated. This is particularly important in high-traffic areas where quick decision-making is essential.

    Higher Placement for Larger Spaces

    In larger spaces like warehouses or auditoriums, signs may need to be placed higher than eye level to ensure they are visible from a distance. Elevated placement allows the signs to be seen over obstacles and equipment, aiding in quicker identification and action during emergencies.

    Avoiding Obstructed Views

    It’s vital to ensure that any objects, furniture, or equipment do not obstruct the view of the sign. An obstructed sign defeats its purpose and could lead to confusion or delays during an emergency.

    Regular inspections should be conducted to ensure that new installations or rearrangements have not compromised the visibility of the signs.

    Considering Viewing Distances

    The size of the sign and the distance from which it can be viewed are also important factors. Larger signs may be necessary for areas where the viewing distance is greater. The text and symbols on the sign should be legible from the furthest point in the area it serves.

    Proximity to Equipment

    Directly Above Equipment

    Placing signs directly above the fire equipment ensures immediate identification. This is particularly useful for equipment like fire extinguishers that may be placed in cabinets or recesses. The sign serves as an immediate visual cue, directing individuals to the equipment’s exact location.

    On Equipment Cabinet Doors

    If fire equipment is stored in a cabinet, placing the sign on the cabinet door is effective. This makes it easier for individuals to quickly identify and access the equipment, especially in stressful situations where every second counts.

    On Nearby Walls

    Sometimes, placing a sign directly above the equipment or on a cabinet door may not be feasible. In such cases, placing the sign on a nearby wall can serve the purpose, provided it is within immediate visual range of the equipment it denotes.

    On Stand-Alone Posts if Necessary

    In open spaces where wall or ceiling mounting is not possible, stand-alone posts can be used to display fire equipment signs. These should be sturdy and tall enough to ensure the sign is visible from a distance.

    The correct placement of fire equipment signs is a nuanced process that requires careful consideration of various factors, including height, visibility, and proximity to the equipment. Adhering to these guidelines will contribute to a safer and more efficient response in emergencies.

    Choosing the Right Size and Material

    The size and material of your fire equipment signs are crucial factors that contribute to their effectiveness in an emergency. These elements determine not only the visibility but also the durability of the signs.

    Therefore, making informed decisions is essential when selecting the size and material for your fire equipment signs.

    Size Requirements

    Each fire equipment sign should be large enough to be easily readable from a distance. This ensures that in an emergency, individuals can quickly identify the location of fire equipment and take appropriate action.

    Large Symbols and Text

    When it comes to size, large symbols and text are indispensable. They catch the eye faster and can be seen from greater distances, aiding in quicker emergency response times. Large symbols and text make identifying the signs easier for people with vision impairments, making your building more inclusive.

    Proportional to the Space

    The size of the sign should also be proportional to the space where it is installed. A sign that is too large for a small room may overwhelm the space, while a sign that is too small for a large area may go unnoticed. Therefore, it’s crucial to consider the dimensions of the area where the sign will be placed.

    Visible from All Angles

    Visibility from all angles is another essential consideration. The sign should be positioned from multiple viewpoints within the space. This ensures the sign remains visible regardless of where someone stands or moves, facilitating quicker responses in emergencies.

    Consideration for Distant Viewing

    Additional considerations such as font type and contrast come into play for signs that need to be viewed from a distance. These elements should be optimised to ensure that the sign is easily readable even from far away, aiding in quick identification and action.

    Material Durability

    Durability is another critical factor, as signs should be made from materials that can withstand various environmental conditions, including heat, cold, and moisture exposure.

    Self-Adhesive Vinyl

    Self-adhesive vinyl is popular due to its ease of application and versatility. It adheres well to various surfaces and is resistant to moisture. However, it may not be the best choice for high-temperature areas as it can peel off over time.

    Rigid Plastic

    Rigid plastic signs are more durable, especially for outdoor or high-traffic areas. These signs are robust and lightweight, making them easy to install. They are also resistant to fading and can withstand exposure to various elements.

    Resistance to Fading

    Resistance to fading is crucial, especially for signs in areas exposed to direct sunlight. UV-resistant materials will maintain their colour and visibility for extended periods, ensuring that the sign remains effective over time.

    Fire-Resistant Materials

    Given that these are fire equipment signs, using fire-resistant materials is not just advisable but essential. These materials will not contribute to the spread of fire and will remain visible even in high-temperature conditions, aiding in emergency response.

    Choosing the right size and material for your fire equipment signs is critical in ensuring effective emergency response. Both visibility and durability are key factors that should guide your selection process.

    Compliance with Regulations

    Ensuring that fire equipment is correctly signposted is not just a matter of best practice; it’s a legal requirement. Compliance with regulations is crucial for building occupants’ safety and can also protect the facility manager or safety officer from potential legal repercussions.

    Understanding Regulatory Standards

    Understanding the standards set by regulatory bodies is the first step in ensuring compliance. The Health and Safety Executive (HSE) and the British Standards Institution (BSI) are two key organisations providing fire safety signage guidelines in the UK.

    Health and Safety Executive (HSE) Guidelines

    The Health and Safety Executive (HSE) is a UK government agency responsible for regulating and enforcing workplace health, safety, and welfare. The HSE has set guidelines under the Health and Safety (Safety Signs and Signals) Regulations 1996. These regulations were implemented to bring the EC Safety Signs Directive 92/58/EEC into UK law. The directive aims to standardise safety signs across European Union member states, ensuring signs have the same meaning wherever they are seen.

    The regulations cover various means of communicating health and safety information, including illuminated signs, hand and acoustic signals, and traditional sign boards such as prohibition and warning signs. Employers are required to provide specific safety signs whenever there is a risk that has not been avoided or controlled by other means. The regulations also require using road traffic signs within workplaces to regulate road traffic and mandate that employers maintain the safety signs they provide.

    British Standards Institution (BSI) Guidelines

    The British Standards Institution (BSI) is the national standards body of the United Kingdom. BSI provides guidelines for fire safety signs, including their design, installation, and maintenance. These guidelines are often more detailed than those provided by the HSE and may include specifications for materials, dimensions, and even the luminance of signs. Adhering to BSI standards can provide an additional layer of assurance that your fire safety signs meet the highest quality and effectiveness criteria.

    Local Fire Safety Regulations

    Local fire safety regulations can also significantly influence how fire equipment should be signposted. These regulations are often specific to the type of building, its usage, and the local authority jurisdiction. They may include requirements for the placement of signs, the frequency of inspections, and the qualifications of the persons responsible for these tasks. Ignoring local regulations can result in fines or legal action and compromise building occupants’ safety.

    Regular Updates on Regulations

    Staying updated on regulations is crucial as they can change over time. For instance, the Fire Safety (England) Regulations 2022 came into force on 23 January 2023, implementing the majority of the recommendations made by the Grenfell Tower Inquiry in its Phase 1 report. These new regulations have specific requirements for high-rise residential buildings and multi-occupied residential buildings, including the need for wayfinding signage visible in low-light conditions and regular checks on firefighting equipment.

    Compliance with regulations is not just a legal requirement but a moral obligation to ensure the safety of a building’s occupants. Understanding and adhering to guidelines from regulatory bodies like the HSE and BSI and local fire safety regulations is crucial for effective fire safety management.

    Maintaining Fire Equipment Signs

    Regular maintenance of fire equipment signs is crucial for ensuring their ongoing effectiveness. Over time, signs may suffer from wear and tear, fading, or other forms of damage that can compromise their visibility and readability.

    This section delves into the essential maintenance practices that can help keep your fire equipment signs in optimal condition.

    Routine Inspections

    Routine inspections are a vital part of maintaining fire equipment signs. These inspections should focus on assessing the physical condition of the signs, including checking for any visible damage, wear, or deterioration.

    It’s advisable to conduct these inspections at regular intervals, such as monthly or quarterly, to ensure that the signs remain in good condition and continue to serve their purpose effectively.

    Regular Cleaning

    Cleaning your fire equipment signs regularly is essential for maintaining visibility and readability.

    Dust, grime, and other contaminants can accumulate on the surface of the signs, making them less effective in guiding people during emergencies. Use a mild detergent and a soft cloth to clean the signs, avoiding abrasive materials that could scratch or damage the surface.

    This practice not only enhances the appearance of the signs but also prolongs their lifespan.

    Checking for Fading

    Over time, the colours and text on fire equipment signs can fade due to exposure to light and environmental factors.

    Fading compromises the effectiveness of the signs, making them less visible and harder to read. It’s crucial to check for signs of fading during your routine inspections and take corrective action, such as replacing the faded signs with new ones, to ensure they remain effective.

    Ensuring Secure Attachment

    The secure attachment of fire equipment signs is critical for their effectiveness. Loose or wobbly signs can fall off, get damaged, or become a hazard themselves.

    During your routine inspections, check the signs’ stability and mounting hardware. If any signs are loose or insecure, reattach them properly to ensure they stay in place and serve their intended purpose.

    Prompt Replacement of Damaged Signs

    If any signs are found to be damaged, faded, or otherwise compromised during your inspections, it’s crucial to replace them promptly. Damaged signs can mislead or confuse individuals during an emergency, leading to delayed response times and potentially worsening the situation.

    Always keep a stock of replacement signs on hand to facilitate quick replacements when needed. Regular maintenance practices like routine inspections, cleaning, and prompt replacement of damaged signs are essential for keeping your fire equipment signs in optimal condition. By adhering to these practices, you can ensure that your signs continue to serve their crucial role in guiding people during emergencies.

    Training and Awareness

    Ensuring that all occupants of your building understand the fire equipment signs is crucial to their effectiveness. A well-placed sign is only as good as its ability to communicate vital information. Therefore, training and awareness are key components in maximising the utility of your fire equipment signs.

    Staff Training

    It’s crucial to include signage information as part of your fire safety training. Staff should be well-versed in each sign’s meaning, location, and purpose.

    Explain The Different Symbols and Colours

    Understanding the different symbols and colours used in fire equipment signs is essential for a quick and effective response during an emergency.

    Symbols are generally designed to be simple and easily recognisable, even from a distance. For example, a fire extinguisher sign typically features a white pictogram on a red background. Red is universally associated with fire and danger, making it instantly recognisable.

    Similarly, green is used for safe condition signs, such as exit routes. The British Standard BS 5499 and the European Norm ISO EN 7010 regulate these symbols and colours to ensure consistency and effectiveness.

    Staff must be trained to recognise these symbols and colours, as they are designed to convey information rapidly without the need for text.

    Discuss the Placement of Signs and What They Indicate

    The placement of fire equipment signs is equally important.

    Signs should be installed at eye level and in locations where they are easily visible. They should not be obstructed by any objects or placed too high or low, as this can impede visibility. The signs should also be illuminated naturally or artificially to ensure they are visible in all conditions. The placement should be logical; for example, a fire extinguisher sign should be directly above the actual fire extinguisher.

    The British Standards Institution provides guidelines on the optimal placement of these signs to maximise their effectiveness.

    Conduct Regular Refresher Courses

    Regular refresher courses are essential to ensure staff remain familiar with the fire equipment signs and their meanings. These courses should be conducted annually and include practical exercises, such as identifying signs during a simulated fire drill. This hands-on approach ensures that staff can apply their knowledge in real-world scenarios, thereby enhancing the overall safety of the building.

    Include Sign Information in Your Fire Drill Practices

    Incorporating sign information into your fire drill practices is another effective way to reinforce staff training.

    During fire drills, staff should be tasked with identifying the nearest fire equipment and exit routes based on the signs. This tests their knowledge and helps them internalise the information, making it second nature during an emergency.

    Building Occupant Awareness

    Visitors, clients, and other non-staff members should also be able to understand your signs. These individuals may not have had the benefit of formal training, making it even more crucial that your signs are easily interpretable.

    Provide Guides or Handouts with Sign Information

    Providing guides or handouts that explain the various fire equipment signs can be an effective way to educate building occupants. These guides should be readily available in reception areas and should be included in welcome packets for new tenants or clients. They should contain clear explanations and illustrations of each sign, along with what action should be taken upon seeing them.

    Incorporate Sign Explanations into Safety Briefings

    Safety briefings offer another opportunity to educate building occupants about fire equipment signs. These briefings should be mandatory for all new occupants and should include a segment dedicated to explaining the signs. This ensures that everyone in the building, regardless of their role, has at least a basic understanding of what each sign means and what to do in an emergency.

    Post Clear Instructions Near Complex Signs

    Providing clear instructions nearby can benefit more complex or less intuitive signs. These instructions should be concise yet comprehensive, providing all the necessary information without overwhelming the reader. They should be placed close to the sign in question, ensuring that anyone needing additional clarification can easily find it.

    Use Universally Recognised Symbols Wherever Possible

    Using universally recognised symbols ensures that your signs are easily understood, even by non-English speakers. These symbols are designed to be intuitive and are regulated by international standards to ensure consistency. Using these symbols can significantly enhance the effectiveness of your fire equipment signs, making your building safer for everyone.

    Training and awareness are vital components in ensuring the effectiveness of your fire equipment signs. From staff training to building occupant awareness, each element plays a crucial role in enhancing the overall safety of your building.

    Signage Consistency

    Maintaining consistency in your fire equipment signage is crucial for aiding recognition and understanding. Consistency ensures that individuals can quickly identify and locate the necessary fire equipment in an emergency, enabling a swift and effective response.

    Consistent Design

    Keeping a uniform design across all signs is essential for immediate recognition. A consistent design language, including specific colours and symbols, helps individuals identify fire equipment signs quickly, reducing the time to respond in an emergency.

    Use Consistent Colours and Symbols

    Utilising a consistent colour scheme and set of symbols across all fire equipment signs is vital. For example, red is universally associated with fire equipment and should be prominently featured.

    Symbols like fire extinguishers or hoses should be standardised to avoid confusion. This uniformity in visual elements not only aids in quick identification but also minimises the risk of misunderstandings during high-pressure situations.

    Maintain a Similar Layout and Style for All Signs

    The layout and style of the signs should also be consistent. Whether it’s the positioning of text, the arrangement of symbols, or the overall design template, uniformity in these aspects ensures that individuals can quickly scan and interpret the signs, especially in stressful situations.

    Choose a Standard Size for All Similar Signs

    Selecting a standard size for all similar signs is another critical aspect of maintaining design consistency.

    A uniform size ensures that the signs are easily visible and identifiable, regardless of their location within the building. This standardisation also aids in creating a cohesive look and feel for all fire safety measures in the facility.

    Ensure Text Style and Size Are Uniform

    The text style and size used on the signs should be uniform to facilitate quick reading and comprehension. A standardised font and text size make it easier for individuals to read the signs from a distance, aiding in quick response times during emergencies.

    Consistent Placement

    Fire equipment signs should always be placed in expected, logical locations to ensure they are easily found when needed.

    Install Signs at Similar Heights Throughout the Building

    Installing signs at a consistent height throughout the building is crucial. This uniformity ensures that individuals instinctively know where to look for fire equipment signs, speeding up emergency response time.

    Always Place Signs Near the Equipment That They Denote

    Signs should always be placed in close proximity to the equipment they denote. This logical placement eliminates any guesswork in locating the fire equipment, allowing for a quicker and more effective response.

    Use Similar Placements for Similar Types of Equipment

    The signs should be placed in similar locations for similar types of fire equipment, such as extinguishers or hoses. This consistency in placement helps individuals quickly identify the type of equipment they need, especially in unfamiliar settings.

    Avoid Hidden or Unexpected Sign Locations

    It’s crucial to avoid placing signs in hidden or unexpected locations. Signs should be easily visible and not obstructed by any objects or placed in corners where they might be overlooked. Hidden or poorly placed signs can delay response times and compromise safety.

    Consistency in designing and placing fire equipment signs is essential for ensuring quick and effective responses in emergencies.

    Conclusion

    In conclusion, correctly implementing and maintaining fire equipment signs can significantly enhance the safety measures in your building. You can ensure a swift response in a fire emergency by understanding the signs, placing them correctly, choosing the right size and material, complying with regulations, maintaining them, and ensuring proper training and consistency.

    Don’t hesitate to contact us for further advice on fire equipment signage. Our team of experts is here to help you create a safer environment.

  • How to Enhance Worksite Safety with Multi-Hazard Scaffold Banners

    How to Enhance Worksite Safety with Multi-Hazard Scaffold Banners

    In the construction industry, safety is of paramount importance. This blog post is tailored for scaffolders and construction workers, focusing on the role of multi-hazard scaffold banners in enhancing worksite safety.
    Scaffold banners provide crucial information about potential hazards and guide workers and visitors around the site. Let’s delve into how these banners can boost safety levels at your worksite.

    Understanding the Role of Scaffold Banners

    Scaffold banners are not just pieces of fabric or PVC; they are essential tools for communicating safety information on construction sites. They serve as the first line of defence in preventing accidents and ensuring everyone on the site knows potential hazards.

    Importance of Scaffold Banners

    Highlighting Potential Hazards

    Scaffold banners are invaluable for highlighting potential hazards on a construction site. They can indicate areas where heavy machinery is in operation, where there might be a risk of falling objects, or where hazardous materials are stored. By clearly displaying this information, scaffold banners help minimise the risk of accidents, creating a safer work environment.

    Guiding Workers Around the Site

    Navigating a construction site can be complex. Scaffold banners assist in guiding workers and visitors around the site, showing them where it is safe to walk and where access is restricted. This is crucial for large sites where multiple activities may occur simultaneously.

    Indicating Work in Progress

    Scaffold banners can also indicate areas where work is in progress, which can be particularly useful for coordinating activities on a busy site. Knowing where work is happening helps to prevent accidental disruptions and allows for better planning and allocation of resources.

    Providing Emergency Contact Information

    In case of an emergency, it’s vital to have quick access to relevant contact information. Scaffold banners often include details such as the site manager’s contact number or the location of the nearest first aid station, providing a quick reference in urgent situations.

    Types of Scaffold Banners

    Multi-Hazard Banners

    Multi-hazard banners are designed to address various risks and safety requirements on a construction site. They are often colour-coded and use standard safety symbols to convey multiple pieces of information at a glance. Some example banners include:

    • Site Safety Scaffold Banner 1: This banner is made of high-quality PVC and is digitally printed with stitched hems. It complies with BS EN 7010 standards and is designed to identify dangers and minimise the risk of accidents. It is available in two sizes and features eye-catching colours—red, blue, and yellow—for optimal visibility.
    • Site Safety Scaffold Banner 2: Also made of durable PVC, this banner is perfect for various workplace settings. It is easy to install and remove, saving hours of work in higher-risk environments.
    • Site Safety Scaffold Banner 3: This banner is similar in design and material to the previous examples but offers another layout option that complies with BS EN7010 standards.
    • Site Safety Scaffold Banner 4: Designed to be both highly visible and robust, this banner comes with “Zone Danger” labels on each panel for added safety compliance.

    Site-Specific Banners

    Site-specific banners are tailored to a particular construction site’s unique hazards and conditions. They can be customised to include site-specific warnings, directions, or emergency contact information.

    Customised Banners

    Customised banners can be created for sites with unique or complex hazards to meet specific safety requirements. To convey precise information, these banners can include bespoke text, images, and safety symbols.

    Banners with Standard Safety Symbols

    These banners utilise universally recognised safety symbols to convey information quickly and clearly. They are beneficial for sites where workers may speak different languages.
    Scaffold banners play a critical role in enhancing safety on construction sites. They serve multiple functions, from highlighting potential hazards to providing emergency contact information, and come in various types to meet the specific needs of each site.

    Correct Placement of Scaffold Banners

    The location of your scaffold banners can significantly influence their effectiveness. Proper placement ensures the banners are easily visible and accessible, maximising their impact on worksite safety. The right location can differentiate between a well-informed team and a potential safety hazard.

    Visibility Considerations

    Banners should be placed where all site personnel can easily see them. The goal is to make the safety information as accessible as possible to everyone on site, from workers to site visitors. Visibility is the first step in the effective communication of safety protocols.

    At Eye Level Where Possible

    Placing banners at eye level is a highly effective strategy for ensuring they are immediately noticeable.
    At this height, the banners are within the natural line of sight for most individuals, making the safety messages more likely to be read and understood. This is particularly beneficial in busy construction environments where workers may be focused on their tasks and less likely to look up or down to read signs.
    The eye-level placement also facilitates quicker decision-making in emergencies, as the information is readily available.

    On Scaffolding at Each Floor Level

    Positioning banners on scaffolding at each floor level serves multiple purposes.

    • First, it ensures that workers at various heights are equally informed about potential hazards.
    • Secondly, it constantly reminds us at every stage of ascent or descent, reinforcing the importance of safety measures.

    This layered approach to information dissemination ensures that no one misses out on crucial safety instructions, regardless of their location on the scaffolding.

    At Site Entrances and Exits

    Placing banners at site entrances and exits serves as a welcome and farewell reminder of the safety protocols to be observed. It ensures that everyone entering or leaving the site knows the safety measures in place, setting the tone for a safety-conscious work environment. This strategic placement acts as a checkpoint for safety awareness, making it a non-negotiable aspect of site operations.

    Near High-Risk Areas

    High-risk areas, such as zones with heavy machinery or hazardous materials, should have banners placed nearby. This ensures that workers are immediately alerted to the specific dangers associated with these areas, allowing them to take appropriate precautions. The banners act as a last-minute safety net, providing critical information about where the highest risk is.

    Proximity to Hazards

    Banners should be strategically placed near the hazards they’re warning about. This ensures that workers are aware of the immediate risks and can take necessary precautions before interacting with these potentially dangerous items. The closer the banner is to the hazard, the more effective it will be in preventing accidents.

    Next to Hazardous Equipment or Materials

    Placing banners next to hazardous equipment or materials serves as an immediate warning to workers. This proximity ensures that the risk is acknowledged before any interaction with the equipment or material takes place. It’s a proactive approach to safety that minimises the chances of oversight or accidental mishandling.

    At the Top of Potentially Dangerous Areas

    Banners at the top of potentially dangerous areas, such as deep excavations or high platforms, serve as a final reminder of the risks involved. They act as a last line of defence, encouraging workers to exercise extreme caution in these zones. This placement is particularly effective because it captures attention at a critical moment, potentially averting a dangerous situation.

    In Areas Where Protective Equipment Is Required

    In zones where protective equipment is mandatory, banners should be prominently displayed. This reminds workers to equip themselves with the necessary safety gear before entering the area. Whether it’s hard hats, safety goggles, or other forms of personal protective equipment, the banner serves as a checkpoint for compliance.

    On or Near the Scaffolding Itself

    The scaffolding structure is an ideal location for banners, especially those related to the safe use of the scaffolding. Placing banners here ensures that the safety message is in the immediate vicinity of the activity it pertains to, making it hard to ignore.
    The strategic placement of scaffold banners is crucial for maximising their effectiveness. By considering both visibility and proximity to hazards, you can ensure that your banners effectively maintain a safe worksite.

    Choosing the Right Size and Material

    Selecting the appropriate sizes and materials for your multi-hazard scaffold banners is crucial for ensuring their durability and visibility. The right choices can significantly affect how effectively these banners convey safety messages to workers and visitors on the construction site.

    Size Requirements

    Your banners should be large enough for easy reading from a distance. This is essential for ensuring safety messages are accessible to everyone on the site.

    Large Enough to Be Seen from Across the Site

    When it comes to size, the banners should be large enough to be visible from various points across the construction site. This ensures that workers and visitors can easily identify potential hazards, even when they are far away from the banner. The dimensions should be such that the text and symbols are legible from at least 10 metres away, which is a standard distance for visibility in safety signage.

    Text and Symbols Should Be Legible

    The text and symbols on the banners must be legible and clear. The use of bold fonts and contrasting colours can aid in readability. The height of the letters should be at least 5 cm for optimal visibility, and the symbols should be universally understood to effectively convey the intended safety messages.

    Size May Depend on the Complexity of the Message

    The size of the banner may also depend on the complexity of the safety message it carries. For instance, a banner warning about multiple hazards may require more space to convey all necessary information adequately. Therefore, choosing a size that can accommodate the complexity of the safety messages you wish to display is advisable.

    Banners Should Not Obstruct the View or Movement

    While size is important, the banners mustn’t obstruct the view or impede the movement of workers and machinery. They should be placed at a height and location where they are easily visible but not in the way of daily operations.

    Material Durability

    Your banners should be made from materials that can withstand the harsh conditions commonly found on construction sites.

    Self-Adhesive Vinyl

    Self-adhesive vinyl is a popular choice for scaffold banners due to its durability and ease of application. This moisture-resistant material can adhere well to various surfaces, making it ideal for indoor and outdoor use.

    Rigid Plastic

    Rigid plastic is another excellent material for scaffold banners. It offers high durability and is resistant to impacts, making it suitable for more demanding environments. However, it may require additional fixtures for secure installation.

    Weather-Resistant Materials

    Using weather-resistant materials is essential for ensuring the longevity of your banners. These materials can withstand conditions such as rain, wind, and extreme temperatures, thereby maintaining the integrity of the safety messages displayed.

    UV-Protected for Fade Resistance

    UV-protected materials are crucial for preventing the fading of text and symbols on the banners. This ensures the safety messages remain clear and visible for an extended period, even when exposed to direct sunlight.
    The right size and material for your multi-hazard scaffold banners are vital factors in enhancing worksite safety. By considering these aspects carefully, you can ensure that your banners are effective and durable.

    Compliance with Regulations

    Ensuring that your scaffold banners are in compliance with all relevant safety regulations is not just a legal necessity but also a moral obligation to protect the lives of workers and visitors on the construction site. This section delves into the intricacies of understanding and adhering to various regulatory standards that govern the use of scaffold banners in the UK construction industry.

    Understanding Regulatory Standards

    Before you even think about installing a scaffold banner, it’s crucial to familiarise yourself with the standards set by regulatory bodies. These standards serve as a framework for what is acceptable and what is not, thereby helping you make informed decisions.

    Health and Safety Executive (HSE) Guidelines

    The Health and Safety Executive (HSE) is a UK government agency responsible for regulating and enforcing workplace health, safety, and welfare standards. According to HSE, scaffolds must be designed, erected, altered, and dismantled only by competent individuals under the supervision of a competent supervisor. The agency outlines several key issues to consider, such as general access scaffold requirements, guard rails, toe boards, and other barriers, scaffold design, and scaffold inspection. HSE also emphasises the importance of strength and stability calculations for scaffolding. If the scaffolding encroaches over the highway, a licence under Section 169 of the Highways Act 1980 is required, issued by the local Highway Authority.

    British Standards Institution (BSI) Guidelines

    The British Standards Institution (BSI) is another key body that sets standards for various industries, including construction. While BSI doesn’t specifically focus on scaffold banners, their guidelines on materials and workmanship can be applied to ensure that your banners are of high quality and meet safety standards. It’s essential to consult BSI standards when selecting materials for your scaffold banners to ensure they are durable, weather-resistant, and capable of withstanding the conditions they will be exposed to.

    Local Construction Safety Regulations

    Local councils may have additional regulations that you need to be aware of. These can include specific requirements for designing, placing, and maintaining scaffold banners. Always check with your local council to ensure you fully comply with local laws. Some councils may even provide a list of approved scaffolding contractors, making choosing a reliable service provider easier.

    Regular Updates on Regulations

    Regulatory standards are not set in stone; they are subject to change based on new research, technological advancements, and lessons learned from past incidents. Therefore, it’s crucial to stay updated on any changes to regulations that might affect your scaffold banners. Regularly consult the websites of regulatory bodies like HSE and BSI, and consider subscribing to newsletters or alerts that will notify you of any updates.
    Compliance with regulations is not just a checkbox to tick off; it’s a continuous process that requires vigilance, education, and proactive measures to ensure the safety of everyone involved.

    Maintaining Your Scaffold Banners

    Regularly maintaining your scaffold banners is essential for ensuring their effectiveness in conveying safety messages and hazard warnings. Proper care not only prolongs the lifespan of these banners but also maintains their visibility and readability, which are crucial for worksite safety.

    Routine Inspections

    Regularly inspecting your scaffold banners to check for any signs of damage or wear is imperative. These inspections should be thorough and include looking for tears, holes, or other physical damage that could compromise the banner’s integrity. Regular checks help in the early identification of issues, allowing for timely repairs or replacements.

    Regular Cleaning to Maintain Visibility

    Maintaining the visibility of your scaffold banners is crucial for effectively communicating safety messages. Dust, grime, and other environmental factors can significantly reduce visibility over time. Regular cleaning is therefore essential. Use a mild detergent and water for cleaning; harsh chemicals can damage the material and fade the print. Using a soft-bristle brush to gently scrub the surface gently is advisable, paying special attention to text and symbols. After cleaning, rinse thoroughly with clean water and allow the banner to air dry. This process enhances visibility and allows inspecting the banner for any hidden damages.

    Checking for Fading or Damage

    Fading is common with scaffold banners exposed to sunlight for extended periods. UV rays can degrade the ink used in printing, making the text and symbols less visible. Regular inspections should include checking for colour fading and print quality. If you notice significant fading, it’s time to replace the banner. Additionally, environmental factors like wind and rain can cause wear and tear. Look for frayed edges, holes, or signs of the material weakening. Such damages can compromise the banner’s effectiveness and should be addressed immediately.

    Ensuring Secure Attachment

    Securely attaching your scaffold banners is vital for safety and effectiveness. Loose or improperly attached banners can become hazards themselves, posing risks like tripping or falling. Use heavy-duty zip ties or industrial-grade fasteners for secure attachment. The fastening points should be evenly distributed to prevent the banner from sagging or flapping in the wind, which can reduce visibility and readability. Regularly check these attachment points during routine inspections to ensure they remain secure.

    Prompt Replacement of Worn-Out Banners

    Worn-out or damaged banners should be replaced promptly to maintain the highest level of safety communication. Keeping a stock of replacement banners is advisable so there is no delay in swapping out old for new. The replacement process should be as rigorous as the initial installation, ensuring secure attachment and optimal visibility.
    Regular maintenance, including cleaning and inspections, is crucial for the long-term effectiveness of your scaffold banners. By adhering to these guidelines, you can ensure that your banners continue to serve their purpose of enhancing worksite safety.

    Training and Awareness

    Ensuring that all site personnel understand the information displayed on scaffold banners is a cornerstone of worksite safety. Proper training and awareness are a regulatory requirement and a moral obligation to protect lives.

    Staff Training

    Incorporating banner information into your safety training regimen is essential. This ensures that your staff are aware of the hazards and understand how to navigate them.

    Explain Different Symbols and Colours

    Understanding the symbols and colours on scaffold banners is crucial for effectively communicating safety information.
    Symbols often used include the exclamation mark for general caution, a fire symbol for fire hazards, and a skull and crossbones for toxic materials. Colours also play a significant role; for instance, red is universally recognised for danger or stop, yellow for caution, and green for safe conditions or go.
    The British Standard BS 5499 governs the design of safety signs, including the use of symbols and colours. It is aligned with the ISO EN 7010 standards, ensuring international recognisability.

    Discuss the Placement and Purpose of Banners

    The placement of scaffold banners is as important as the information they convey. Banners should be placed at eye level and in locations where they are easily visible to everyone entering the site. They should be positioned near the hazards they are warning about but at a safe distance to allow for corrective action.
    The purpose of these banners is to provide immediate, easily digestible information to prevent accidents and guide both workers and visitors.

    Conduct Regular Refresher Courses

    Regular refresher courses are essential to ensure the staff’s current knowledge of the symbols and safety procedures. These courses should be conducted annually and include practical exercises that simulate real-world scenarios.
    The training should be updated to include any new symbols or safety procedures that have been introduced.

    Include Banner Information in Site Inductions

    Every new worker or subcontractor should be given a site induction that includes detailed explanations of the scaffold banners. This ensures that even those new to your site are immediately made aware of the safety protocols and what each banner symbol and colour signifies.

    Site Visitor Awareness

    It’s not just the site personnel who need to understand your banners; visitors should, too. Clear instructions and guides can help them navigate the site safely.

    Provide Guides or Handouts with Banner Information

    Printed guides or handouts explaining the symbols and colours on your scaffold banners can be invaluable for site visitors. These guides should be concise yet comprehensive, covering all the symbols used on your site.

    Incorporate Banner Explanations into Safety Briefings

    Every visitor should undergo a safety briefing that includes an explanation of the scaffold banners. This ensures that they are aware of the hazards they might encounter and how to avoid them.

    Post Clear Instructions Near Complex Banners

    Posting additional clear instructions nearby can be beneficial for banners that convey complex information or multiple hazards. These can be in the form of smaller signs or labels that provide a more detailed explanation of the banner.

    Use Universally Recognised Symbols Wherever Possible

    Using universally recognised symbols ensures that even visitors who may not speak the language can understand the safety instructions. This is particularly important in multicultural worksites where language can be a barrier.
    Adequate training and awareness of scaffold banners are integral to maintaining a safe worksite. Both staff and visitors should be well-informed about what each symbol and colour means and how to react accordingly.

    Customising Your Scaffold Banners

    Customising your scaffold banners is not merely an aesthetic choice but a strategic one that can significantly enhance the safety and efficiency of your worksite. By tailoring your banners to your site’s specific needs and conditions, you can ensure that they serve as effective tools for hazard communication and site navigation.

    Reflecting Site-Specific Hazards

    Your scaffold banners should be more than generic safety signs; they should accurately represent the hazards present on your site. This means that if your site has unique risks, such as chemical exposure or electrical hazards, these should be clearly indicated on your banners.

    Accurately Identify and Display All Potential Hazards

    Conducting a thorough risk assessment to identify all potential hazards on your site is crucial. Once identified, these hazards should be prominently displayed on your scaffold banners. This not only complies with health and safety regulations but also ensures that workers and visitors are fully aware of the risks they may encounter.

    Use Clear, Simple Language to Describe Risks

    While it might be tempting to use technical jargon, remember that not everyone on the site may be familiar with such terms. Use clear and straightforward language to describe risks. This ensures everyone, from skilled workers to occasional visitors, easily understands the message.

    Include Visual Representations of Hazards Where Possible

    Visual cues can be more immediate and impactful than text. Including pictograms or illustrations of the hazards can make it easier for people to quickly understand the risks, especially in high-stress situations where reading may be difficult.

    Regularly Update Banners to Reflect Changing Site Conditions

    Worksite conditions can change rapidly; your scaffold banners should reflect these changes. Regular updates are essential to ensure the banners remain relevant and communicate current hazards and safety protocols effectively.

    Including Site Information

    In addition to hazard warnings, your banners can serve as informational guides. They can provide essential details that enhance safety and operational efficiency.

    Display Site Map or Layout

    Including a simple site map or layout on your scaffold banners can help workers and visitors navigate the area more efficiently. This is particularly useful for large or complex sites where getting lost or taking a wrong turn can lead to safety risks.

    Indicate the Location of First Aid Stations or Emergency Equipment

    Knowing where to find first aid stations or emergency equipment can be crucial in a crisis. Clearly marking these locations on your banners can save valuable time when it matters most.

    Provide Contact Details for a Site Manager or Safety Officer

    In case of emergencies or uncertainties, it’s beneficial to have a go-to person for immediate assistance. Providing the contact details of a site manager or safety officer can facilitate quicker resolution of issues.

    Highlight Restricted Areas or No-Go Zones

    Certain areas on the worksite may be off-limits due to high risks or sensitive operations. Clearly marking these as restricted areas or no-go zones on your banners can prevent unauthorised access and potential accidents.
    Customising your scaffold banners is an effective strategy for enhancing worksite safety. By being specific and up-to-date, these banners can serve as invaluable tools for risk communication and site navigation.

    Effective Use of Colour and Symbols

    The use of colour and symbols on multi-hazard scaffold banners is not merely a design choice; it’s a strategic decision that can significantly enhance the readability and comprehension of your banners.
    You can make your banners more effective and intuitive by employing a well-thought-out colour scheme and universally recognised symbols.

    Colour Coding for Different Hazards

    Different colours can be used to signify different types of hazards. For example, red could indicate fire hazards, while blue could signify water-related risks. This intuitive approach allows workers and visitors to identify the type of hazard they might encounter quickly.

    Use a Consistent Colour Scheme Across All Banners

    Consistency is key when it comes to colour coding. Using a consistent colour scheme across all banners ensures that there is no confusion.
    For instance, if red is used for fire hazards on one banner, it should be used for the same purpose on all other banners. This uniformity aids in quick recognition and response, thereby enhancing safety.

    Follow Standard Colour Coding Practices

    It’s advisable to follow standard colour coding practices, such as red for fire hazards and green for first aid. These standards are often aligned with ISO EN 7010, which is internationally recognised. Adhering to these standards makes your banners more intuitive and complies with safety regulations.

    Ensure Colours Are Bright and Easily Distinguishable

    The colours used should be bright and easily distinguishable from one another. This is crucial in ensuring the banners are visible from a distance and in varying light conditions. Faded or similar-looking colours can lead to misunderstandings, which could be dangerous in a worksite environment.

    Avoid Using Too Many Colours on a Single Banner

    While making your banners colourful and eye-catching might be tempting, using too many colours can be counterproductive. An overload of colours can make the banner confusing and hard to read, defeating the purpose of quick and effective communication.

    Using Recognisable Safety Symbols

    Symbols are another effective way to convey important safety information. The brain can process them quickly, making them ideal for high-risk environments like construction sites.

    Use Internationally Recognised Safety Symbols

    Using internationally recognised safety symbols is crucial for ensuring that a diverse workforce understands your banners.
    These symbols are designed based on extensive research and are universally accepted. For example, a symbol of a fire is universally understood to signify a fire hazard, while a cross symbolises medical aid. These symbols are often standardised under ISO 3864 and ISO 7010, ensuring they meet rigorous safety and comprehensibility standards.
    Using these symbols ensures that your banners are effective and compliant with international safety standards.

    Ensure Symbols Are Large and Clear

    The size of the symbols used should be large enough to be easily seen from a distance. Small or intricate designs can be hard to decipher, especially in a busy or cluttered environment. Therefore, opt for symbols that are simple, large, and clear.

    Pair Symbols with Text for Clarity

    While symbols are effective, pairing them with text can eliminate any ambiguity. For example, a symbol indicating a fall hazard can be accompanied by the text “Caution: Fall Hazard” to clarify the message.

    Regularly Update Staff and Visitors on Symbol Meanings

    Even with the use of internationally recognised symbols, it’s essential to regularly update staff and visitors about what these symbols mean. This can be done through safety briefings or informational pamphlets distributed at the worksite.
    The effective use of colour and symbols in multi-hazard scaffold banners is an essential aspect of worksite safety. By adhering to best practices and international standards, you can create visually appealing banners that are highly functional in conveying critical safety information.

    Conclusion

    In conclusion, multi-hazard scaffold banners are essential in maintaining safety on construction sites. By customising your banners, effectively using colour and symbols, and following the other guidelines outlined in this post, you can significantly enhance the safety and efficiency of your worksite.
    Don’t hesitate to contact us for further guidance on creating effective multi-hazard scaffold banners. Our team of experts is here to help you ensure the highest levels of safety at your worksite.