Tag: Guides

  • A Guide To Electrical Safety

    A Guide To Electrical Safety

    Research from the HSE has found that approximately 1,000 workplace accidents are caused by an electric shock or burn every year. And, an estimated 30 of these are fatal. In 2015/16, 1380 fatalities or injuries were reported as a cause of electrical fires. The use of electricity is something that we are all heavily exposed to every single day. Few businesses can operate without devices, machinery and equipment powered by electricity. And, this is why electrical safety is so important. In this guide, we’ll cover everything you need to know.

    Why Is Electricity So Dangerous?

    Because we use electricity every single day, it’s easy to become complacent with our knowledge of its dangers. Direct contact with electricity can cause serious damage to the human body. An electric shock may simply feel like a sizzle on the skin. Or, in worst-case scenarios, it can directly impact the natural workings of your lungs and heart. Electrical burns, heart attacks and interference with the nervous control system are all complications you can expect. There is also the secondary issue of accidents occurring because of electrical shocks. For example, if these happen while working at height, it increases the chance of falls, trips and slips.

    The main reason why it becomes so dangerous in the workplace is that it cannot be avoided. Many essential workplace tasks are powered by electricity. This is why employers must take the necessary precautions to significantly minimise or eliminate the hazards linked to electricity usage. The good news is that these precautions are simple and can be implemented quickly.

    UK Regulations For Electrical Safety In The Workplace

    There are several laws and legislation in place to protect employees from electrical-based injuries. Some are relevant to specific environments – such as those where exposure to highly explosive materials is commonplace. Others cover every working setting, from the office through to agricultural businesses.

    The Electricity at Work Regulations

    Established in 1989, The Electricity at Work Regulations legislation applies to all aspects of electricity use in the workplace. It states that there are numerous responsibilities for employers, employees and self-employed individuals to help actively reduce the risk of danger. These duties include:

    • Having electrical installations that are designed to reduce risk.
    • Having a regular and reliable maintenance schedule to keep electrical equipment in good working order.
    • Enlisting the support of professional NICEIC approved electrical surveyors to carry out any required works.
    • Ensure that any electrical equipment used in extreme weather, temperatures or corrosive conditions is properly constructed and suitable for the application.
    • Ensure that all employees have the relevant training, information, experience and supervision to use the electrical equipment properly.

    Electrical Equipment (Safety) Regulations

    Replacing the Low Voltage Electrical Equipment (Safety) Regulations 1989, this legislation sets up the need for all electrical equipment to be safe for use. It applies to all electrical equipment that will be connected to the mains electrical supply. All items for use between 50-1000 volts (AC) or 75-1500 volts (DC) must be constructed in accordance with good engineering practices. It must conform to the existing regulatory safety objectives.

    For the employer to abide by these regulations, they should choose electrical equipment with the UKCA mark.

    Electrical Risk Assessments

    With all hazards in the workplace, the employer must make sure an appropriate risk assessment has been carried out. Focusing on the electrical equipment present, it needs to:

    • Identify each individual risk.
    • Establish who could be harmed.
    • Establish how likely the injury/accident is likely to occur.
    • Identify whether the risk can be eliminated.
    • If not, find and establish a measure that can be used to reduce the risk.

    This assessment can take place as part of the comprehensive health & safety risk review. However, you need to consider electrical hazards individually as the measures required to reduce them will be unique.

    Managing Electrical Safety In The Workplace

    Understanding the risk associated with electrical equipment is one thing. Now you need to implement measures into your workplace that actively reduce the chance of accidents.

    Here are our recommendations on how to get started with ensuring your electrical equipment is safe for use.

    1. Carry Out A Risk Assessment. This should include developing and implementing measures to either eliminate or reduce the risk at hand.
    2. Assess All Electrical Equipment To Ensure Its Suitability. Items that present a hazard should only be used for their intended purpose.
    3. Make Sure The Environment Is Safe. Damp/wet environments, for example, pose unique hazards. You may need to consider reduced voltage machinery or using air-powered devices instead. If explosive materials are in the vicinity, there are also additional measures that need to be implemented.
    4. Implement A Maintenance And Servicing Programme For All Electrical Installations. This will ensure each item is in full working order.
    5. Identify The Type Of Electrical Supply You Have. You can do this with the support of a professional electrician. And, this information will help to ensure the equipment you use is suitable for use with your electricity supply.
    6. Provide Full Training To Employees. This should be done regularly and updated with the latest advice to keep everyone safe.
    7. Provide PPE, Where Required. You should also ensure all employees know how to use/wear this equipment and its purpose.
    8. Install Relevant Electrical Safety Signs. These provide clear, concise and exact information to employees and temporary visitors to help identify hazards and promote safe working practices.

    How Electrical Safety Signs Can Help To Reduce Accidents

    Pre-emptive measures are always a better option than waiting for an accident to happen. Providing in-depth training is the best way to ensure all employees have the tools and knowledge needed to safely work with electricity. And, alongside these, the right safety signs provide prompts throughout the day to help reinforce the message.

    Electrical warning signs help to identify areas where there is a risk of electrical danger. Those manufactured here at Lasting Impressions abide by ISO 7010, using universally recognisable logos and colours to ensure the message is clear. Your risk assessment will identify the locations throughout your workplace where visual prompts would reduce the risk of injury. This is where you should consider installing a safety sign.

    For example, Main Switch SignDanger High Voltage and Danger Live Wires signs can all be used – either individually or in unison – to identify various hazards around the workplace. Temporary signs, like the Electric Fence Sign or Men Working On Electrical Circuits Line, provide guidance to non-employees. And all of our professional safety signs can be fitted both inside and out, depending on the hazards identified during your risk assessment. For more information or advice about implementing electrical safety signs into your workplace, please do get in contact with us here today.

  • A Guide To Safe Condition Signs

    A Guide To Safe Condition Signs

    Here in the UK, safety signs form a key role in the management of risk and hazards in the workplace. Understanding the different types and when they should be used is vital. Safe Condition signs are just one such type, but one that is used by a vast array of different industries. And, therefore, you must understand what they are and where they may be beneficial around the workplace. That’s what we’ll delve into in this guide here today.

    What Are Safe Condition Signs?

    Safe condition signs display the actions that can be taken to keep the reader and surrounding people safe during a certain situation. They can normally be followed to find safety – whether that be in the form of an escape route or an item of safety equipment. A number of these signs form part of your fire safety actions at work, providing clear directions to individuals in the event of a fire or alternative emergency. They are specifically designed to be bright, bold and easy to read from a distance – used during times of panic to help calm a situation and identify a solution at hand.

    Here at Lasting Impressions, we have a wide range of safe condition signs that conform to EN ISO 7010:2012 and fit in with your business requirements easily.

    How To Spot A Safe Condition Sign?

    As we mentioned above, safe condition signs are designed to be highly visible. They are always green with a white pictogram that follows ISO 7010 standards. Many also feature a white border around the outside to help highlight their presence to onlookers. This colour combination has been chosen for its high contrast – ensuring that the desired message is conveyed to the reader.

    Safe condition signs are largely used for fire safety. However, there are a multitude of designs available outside of these. On our website, we have a wide range of styles to choose from. Let’s take a look at some of these now:

    Safe Water Condition Signs

    In certain environments, such as hotels and the hospitality industry, guests must identify where fresh, safe drinking water is located. Our Drinking Water Signs perform this role easily, while Mains Water Tap signs act as identification for engineers or repair professionals. You can also find Emergency Eye Wash signs that indicate the water is safe and clean enough for first aid use as well as Emergency Stop signs for more pressing situations.

    Emergency Contact Condition Signs

    In the event of an emergency where other professionals are needed, the Emergency Telephone Sign highlights devices that are directly linked to the services. If you have a more direct contact route, we also have Emergency Call Point Signs that can be situated next to panic buttons or direct response buttons.

    Gas Safety Condition Signs

    Being able to quickly turn off a gas supply can prevent an explosion or fire. The Main Switch Sign or Gas Shut Off Control Valve sign can both be used for this purpose, directing people to the right switch to reduce the risk of more service accidents.

    In Case Of Emergency Condition Signs

    Some fire alarms or fire safety equipment is kept locked away behind glass cabinets to prevent it from being inappropriately used outside of an emergency. Signs such as the In Case Of Fire Break Glass For Key sign or In Case Of Fire Break Glass Bolt To Open signs provide this vital information to anyone walking past in an easy to digest format.

    Door Safe Condition Signs

    Following UK law, commercial properties must have fire doors installed wherever they are deemed to protect in the event of a fire. For example, if you have a storeroom with flammable or hazardous goods, there will need to be a fire door. If you have multiple storeys within a property, you will need fire doors to barricade the stairwells. Fire doors are vital and there are numerous different types on the market to meet individual needs.

    Door safe condition signs guide as to how to open a particular door in the event of a fire. For example, the Push Bar To Open Sign or Push Pad To Open Sign gives clear direction during times of panic or worry. You will also find options such as our This Door Is For Emergency Use Only Sign or the This Way Out Square Signs.

    All of the signs listed above should be used in line with your other safety measures and as a means to reduce risk or hazards in the workplace.

    Finding The Right Safe Condition Signs For Your Workplace

    So, how do you know which safe condition signs your workplace needs? Before installing any signs or safety measures in the workplace, you must undertake a detailed risk assessment. This will identify all hazards and potential areas for injury around the workplace and help you decide on how to minimise the possibility of these happening. Where possible, you should always try to fully eliminate the hazard. However, when this would adversely impact your business or productivity, you must find means to significantly reduce it – which can be done through safety signs.

    Once your risk assessment has been completed, it will flag up areas where these helpful signs can come in handy. And, from here, you will be able to determine which safe condition signs work best in your business. Always remember:

    • Never overcrowd your signs as this can create a confusing message
    • Aim to work with other trained professionals during the design and install of your signs to help identify any issues
    • Opt for safe condition signs that are manufactured in the right material for your location
    • Make sure you take into account viewing distance during installation to ensure the message can be read

    How Can Lasting Impressions Help?

    As leaders in the design and manufacture of quality safety signs for your business, Lasting Impressions is here to make sure you actively reduce the risk of accidents in the workplace. We have a highly skilled and experienced team on hand to provide guidance and advice, with the backing of over 250,000 signs in stock and 48 hour delivery times on many of our products. If you would like to speak to one of us today or have any questions, please do get in contact with us here.

  • Using First Aid Posters to Boost Workplace Safety

    Using First Aid Posters to Boost Workplace Safety

    Welcome to our blog post, where we aim to inform and guide health and safety officers and HR managers on the essential role of first-aid posters in enhancing safety in the workplace.

    The Importance of First-Aid Posters

    First-aid posters play a pivotal role in fostering a safe environment in the workplace. These informational tools offer clear and concise guidance that can be a beacon of knowledge in emergencies, potentially saving lives.

    They are not just informative but are a legal requisite in the UK, underlining their significant role in maintaining safety standards.

    Why First-Aid Posters are Necessary

    First-aid posters serve as a constant reminder to the staff about the safety procedures, ingraining them in the daily consciousness of everyone in the workplace. They are indispensable during emergencies, offering readily accessible instructions that can guide individuals to respond swiftly and appropriately, mitigating the potential adverse outcomes of the emergency.

    Moreover, these posters are an effective tool in training new employees, ensuring they are well-acquainted with the safety protocols from the outset. The visual nature of these posters facilitates easy understanding, making the training process more efficient.

    Legal Requirements for First-Aid Posters

    In the UK, the display of first-aid posters in the workplace is not just a safety measure but a legal requirement under the health and safety law. Adherence to this law is not optional; non-compliance could result in penalties, emphasising the necessity of regular audits to ensure the posters are current and visible at all times.

    Selecting posters that meet the Health and Safety Executive (HSE) standards is crucial. It is incumbent upon the health and safety officers and HR managers to ensure that the posters displayed are up-to-date with the latest guidelines, fostering a safe workplace compliant with the legal requisites.

    Having first-aid posters concerns compliance and creating a safe, informed, and responsive work environment. It is a step towards a safer future, ensuring every individual knows how to respond in emergencies, potentially saving lives and reducing the severity of injuries sustained.

    It is a testament to an organisation’s commitment to the safety and well-being of its employees.

    Different Types of First-Aid Posters

    In the workplace, being prepared for any emergency is paramount. Various first-aid posters are designed to cater to different emergencies that might occur. These posters serve as a quick reference guide in critical situations, providing clear and concise instructions on responding to various accidents.

    In this section, we delve into the details of each type of first-aid poster available for enhancing safety in the workplace.

    First-Aid For Burns Poster

    Overview

    The First-Aid For Burns Poster is a crucial resource in the workplace, designed to equip both first aiders and non-first aiders with the essential knowledge needed to respond to burn injuries effectively. It is particularly indispensable in environments with a high risk of burn incidents, ensuring that individuals can take immediate and appropriate actions to mitigate the severity of burn injuries.

    Key Features

    The poster is a comprehensive guide, offering full-colour illustrations and user-friendly text that provides clear and concise instructions on a range of critical topics. These include:

    • Burn classification advice helps individuals understand the different types of burns and their severities.
    • Detailed guidance on how to treat both standard and chemical burns, ensuring that individuals can respond appropriately to different burn scenarios.
    • Instructions on how to dress a burn injury appropriately, aiding in reducing infection risks and promoting quicker healing.
    • Steps to handle situations where clothing is on fire, guiding individuals on responding swiftly to prevent further injuries.
    • Advice on dealing with complicated burns and burns of varying severities, ensuring that even in the case of severe burns, the proper first aid steps are taken to preserve life and reduce harm.

    The poster is fully updated with the latest guidance and best practices, making it a reliable resource for up-to-date information on handling burn emergencies effectively. It serves as a quick reference guide, helping to foster a safer work environment by empowering employees with the knowledge they need to respond to burn injuries promptly and correctly.

    First-Aid For Children Poster

    Overview

    The First-Aid For Children Poster is an indispensable tool in environments where children are present, offering detailed guidance on administering first aid to children. Compiled by qualified health and safety practitioners, it encompasses a range of first-aid methods crucial in emergencies involving children.

    Key Features

    This poster is a rich resource with full-colour illustrations and user-friendly text, providing clear and concise instructions on handling various emergencies children might face. It covers a wide array of topics, including:

    • Choking: Guiding on the immediate steps to undertake if a child is choking, ensuring quick action to prevent severe complications.
    • Unresponsiveness: Offering guidance on responding when a child is unresponsive, facilitating immediate intervention to ascertain the child’s safety.
    • Recovery Position: Illustrating the correct way to place a child so that they are in the recovery position is a vital step in maintaining an open airway and preventing further complications.
    • Resuscitation: Providing detailed instructions on resuscitation, a life-saving technique in critical situations.
    • Defibrillation: Guiding on defibrillators in emergencies is crucial in reviving a child experiencing cardiac issues.
    • Fever: Offering advice on managing a child with a fever, ensuring comfort and monitoring the child’s condition.
    • Asthma & Bleeding: Guiding in managing asthma attacks and controlling bleeding is essential in preventing exacerbation of the conditions.

    The poster is continually updated to reflect the latest guidance and best practices in first aid, ensuring that caregivers and others are equipped with the most current and reliable information to handle emergencies effectively. It leverages child-friendly illustrations to clearly and effectively convey necessary actions, promoting quick and informed emergency responses.

    First-Aid for Construction Sites Poster

    Overview

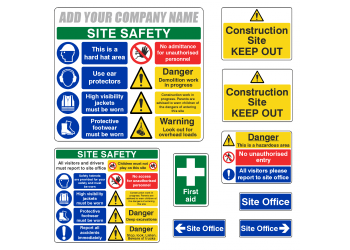
    Construction sites are environments where accidents are prone to occur, hence the indispensable role of the First-Aid for Construction Sites Poster in such settings. This poster serves as a comprehensive guide, offering clear step-by-step instructions on dealing with the most common injuries in a construction environment. It is designed to cater to first and non-first aiders, providing them with essential first aid and safety information.

    Key Features

    The poster is a rich resource of vital information, updated with the latest guidance and practices to ensure the relevance and accuracy of the advice given. It encompasses a range of topics critical to construction site safety, including:

    • Electrical Burns: Detailed guidance is provided on recognising the signs and symptoms of electrical burns and the appropriate treatment procedures to follow.
    • Managing Bleeds: The poster offers a systematic approach to managing bleeds, including the use of barriers, locating and examining the wound, and applying external direct pressure to control bleeding.
    • Crush Injuries: It gives nuanced advice on handling crush injuries, delineating the steps to take depending on whether the individual has been crushed for less than or more than 15 minutes.
    • Falls: This section covers a range of injuries resulting from falls, including spinal and head injuries and fractures, offering guidance on how to respond to each effectively.
    • Managing Chemical Burns: Here, individuals are guided on the steps to take in the event of chemical burns to mitigate the damage and facilitate recovery.
    • Getting Help: The poster underscores the importance of seeking professional assistance, providing emergency service numbers 999/112 to call in such situations.

    The poster facilitates quick comprehension through full-colour illustrations and user-friendly text, enabling individuals to take swift and appropriate actions in emergencies. It is a beacon of safety awareness, encouraging a culture of readiness and responsiveness in the face of accidents.

    First-Aid For Eyes Poster

    Overview

    Eye injuries demand an immediate and appropriate response to prevent further damage. The First-Aid For Eyes Poster serves as a comprehensive guide, offering clear step-by-step instructions on how to provide treatment to someone who has suffered an eye injury. It is designed to assist first aiders and non-first aiders, furnishing them with essential first aid and safety information.

    Key Features

    The poster is a reservoir of crucial information, presenting full-colour illustrations accompanied by user-friendly text to guide individuals in handling a variety of eye injuries effectively. It covers a range of topics including:

    • Examining the Eye(s): Detailed guidance on examining injured eyes to assess the extent of the injury.
    • Irrigating the Eye(s): Instructions on how to clean the eyes properly to prevent further damage.
    • Chemical Contamination: Comprehensive guidance on responding to chemical contaminations, highlighting the dos and don’ts in such situations.
    • Bruised Sockets: Advice on how to treat bruised sockets to alleviate pain and prevent complications.
    • Arc Eye: Provides background information on arc eye condition, including signs, symptoms, and treatment procedures.
    • Dressings: Guidance on how to deal with embedded foreign bodies, distinguishing between major and minor cases and the appropriate response for each.
    • Getting Help: Instructions on when and how to call for emergency services, emphasising using 999/112 for immediate assistance.

    This poster is fully updated with the latest guidance and practices, ensuring that individuals are equipped with the most current and reliable information to respond effectively to eye injuries. It employs vivid visuals and clear instructions to facilitate quick comprehension in emergency situations, making it an indispensable tool in the workplace.

    Pre School First-Aid Poster

    Overview

    Children are naturally curious in preschool settings, sometimes leading to accidents. The Preschool First-Aid Poster is a vital resource that qualified health and safety practitioners crafted to guide caregivers in delivering effective first aid to infants and ensuring their safety during emergencies.

    Key Features

    The poster is a rich source of information, offering guidance on a wide array of first-aid methods that are essential in a preschool setting. It is designed with full-colour illustrations and user-friendly text to provide clear and concise instructions on handling various emergencies, including:

    • Choking: Recognising the signs of choking and the immediate actions to assist a choking child.
    • Unresponsiveness: Understanding the steps to follow when a child is unresponsive.
    • Recovery Position: Detailed guidance on how to place infants, including those under one year old, in the recovery position to maintain an open airway and ensure their safety.
    • Resuscitation: Following the DRAB (Danger, Response, Airway, Breathing) procedure, checking for the presence or absence of breathing and initiating CPR if necessary.
    • Fever: Recognising the symptoms of fever and meningitis and understanding the actions to take during a seizure, including how to cool a child and administer medication appropriately.
    • Asthma & Bleeding: Identifying the signs of an asthma attack and severe bleeding and knowing the correct actions to take in such situations, including where to seek assistance.

    This poster is continually updated to reflect the latest guidance and best practices, ensuring caregivers have the most current information at their fingertips to respond effectively to emergencies and safeguard the well-being of the children in their care. It is an indispensable tool in preschool environments, promoting safety and preparedness through easy-to-follow instructions and vivid illustrations.

    Workplace First-Aid Guide Poster

    Overview

    Every workplace should be equipped with a Workplace First-Aid Guide Poster to guide employees on responding to various emergencies that might occur in a workplace setting. This poster is a pivotal tool that ensures employees have the requisite knowledge to act swiftly and appropriately in the event of an accident, offering essential first aid and safety information for both first aiders and non-first aiders.

    Key Features

    The poster is a reservoir of vital information, providing clear, step-by-step instructions for dealing with the most common workplace emergencies. It is updated with the latest guidance and best practices, ensuring that the advice given is both current and in line with the recommended procedures.

    The guidance encompasses a range of topics, including:

    • Identifying dangerous situations to prevent escalation
    • Responding promptly to emergencies and securing professional help
    • Checking airways and breathing to ascertain the victim’s condition
    • Procedures for resuscitation and defibrillation to revive individuals in critical conditions
    • Handling fractures, burns, and bleeding to mitigate further harm

    Full-colour illustrations accompany user-friendly text, facilitating a quick understanding during emergencies and aiding individuals in taking the correct actions to preserve life and reduce the severity of injuries.

    In the following sections, we will delve deeper into specific types of first-aid posters that focus on accident response and CPR, providing a thorough understanding of how to use them effectively in emergencies.

    Accident Response Posters

    In the event of an accident, a swift and appropriate response can be the difference between life and death.

    Accident response posters are vital in guiding individuals on the correct steps to take immediately after an accident. These posters are designed to be easily understandable, providing clear and concise instructions on evaluating the situation and offering basic first aid before professional help arrives.

    Let us explore the various aspects covered in these posters.

    Guidelines on How to Evaluate the Situation

    When an accident occurs, it is crucial to quickly and accurately evaluate the situation to determine the best course of action. The poster guides individuals in assessing the severity of the injuries and the safety of the surroundings. It encourages individuals to remain calm and collected, ensuring they can think clearly and make informed decisions.

    Steps to Follow Immediately After an Accident

    Once the situation has been evaluated, the next step is to take immediate action to assist the injured person. The poster outlines the steps to follow, such as calling for help, applying pressure to stop bleeding, and ensuring the injured person is breathing. It provides a step-by-step guide on responding to various injuries, helping prevent further harm and preserve life.

    Instructions on Providing Basic First Aid

    Offering basic first aid is a critical step in accident response. The poster provides detailed instructions on administering first aid for different types of injuries, including burns, cuts, and fractures. It guides individuals on using first-aid kits effectively, ensuring they can assist before professional medical help arrives.

    Guidance on When and How to Call for Professional Assistance

    Calling for professional assistance is often necessary to respond to an accident. The poster guides individuals on when and how to call for help, providing information on the emergency numbers to dial and the details to provide to the emergency services. It emphasises the importance of calling for professional help in severe cases to ensure the best possible outcome.

    CPR Posters

    Cardiopulmonary resuscitation (CPR) is a life-saving technique used in emergencies where someone’s breathing or heartbeat has stopped.

    CPR posters are designed to guide individuals on performing CPR correctly, highlighting the importance of early intervention and providing instructions on using automated external defibrillators (AEDs) and executing the recovery position.

    Let’s delve into the details of each aspect covered in these posters.

    Correct Techniques for Performing CPR

    Performing CPR correctly is vital in preserving life in emergencies. The poster provides a detailed guide on the correct techniques for performing CPR, including the appropriate hand placement, the depth of compressions, and the rate of compressions. It encourages individuals to perform CPR confidently, ensuring they can provide the necessary assistance in critical situations.

    The Significance of Early Intervention

    Early intervention in emergencies can significantly increase the chances of survival. The poster emphasises the importance of acting quickly in emergency situations, encouraging individuals to step in and offer help without hesitation. It highlights the critical role that early intervention plays in saving lives, urging individuals to take immediate action in emergencies.

    Instructions on Using an Automated External Defibrillator (AED)

    An AED is a device used to help those experiencing sudden cardiac arrest. The poster provides clear instructions on how to use an AED, guiding individuals on how to operate the device correctly to deliver a shock and potentially save a life. It outlines the step-by-step process of using an AED, ensuring that individuals can use it effectively in emergencies.

    The Importance and Execution of the Recovery Position

    Once CPR has been administered, placing the individual in recovery is a crucial next step. The poster outlines the importance of the recovery position in maintaining an open airway and preventing aspiration. It provides detailed instructions on how to execute the recovery position correctly, ensuring the individual’s safety until professional help arrives.

    In this section, we have explored the critical information contained in accident response and CPR posters, highlighting the importance of having these resources readily available in the workplace to guide individuals in responding effectively to emergencies.

    This knowledge will empower you to take decisive action in emergencies, potentially saving lives and reducing the severity of injuries.

    Placement and Maintenance of First-Aid Posters

    Safety should always be a priority in a workplace’s bustling environment. A pivotal element that fosters a safe working environment is the strategic placement and regular maintenance of first-aid posters. These posters serve as a constant reminder and a quick reference guide in emergencies, helping to foster a culture of safety and awareness.

    In this section, we delve deeper into the nuances of effectively placing and maintaining first-aid posters in the workplace.

    Effective Poster Placement

    Identifying the optimal locations for first-aid posters is critical in ensuring they serve their intended purpose effectively. It is imperative to place them in areas with high footfall to guarantee maximum visibility. These areas could include hallways, break rooms, and near machinery with higher risk factors.

    Moreover, the posters must be clearly visible and unobstructed to ensure that individuals can easily access the vital information displayed. This means avoiding areas where they might be hidden behind doors or other structures.

    A strategic approach would be to position them near first aid kits or Automated External Defibrillators (AEDs) to offer guidance where it is most likely to be sought during emergencies.

    Furthermore, placing the posters at eye level facilitates easy reading, allowing individuals to quickly grasp the necessary information without straining. This thoughtful placement ensures that, in the event of an emergency, individuals can swiftly and accurately follow the guidance provided, potentially saving lives.

    Regular Maintenance and Updates

    Maintaining the pristine condition of first-aid posters is equally important as their strategic placement. Keeping them clean and undamaged is essential to preserve their readability and effectiveness over time.

    In addition to physical maintenance, it is vital to replace outdated posters promptly to provide the most current and relevant information. Regular information review is necessary to ensure accuracy, reflecting the latest first-aid guidelines and procedures.

    Engaging staff in the maintenance process helps keep the posters in good condition and heightens awareness regarding the importance of first-aid preparedness. It encourages a proactive approach to safety, where every team member understands and appreciates the value of the information displayed on the posters.

    The meticulous placement and maintenance of first-aid posters are regulatory requirements and essential practices in fostering a safe and responsive work environment. By adhering to the guidelines outlined in this section, health and safety officers and HR managers can significantly enhance workplace safety, ensuring that all employees are equipped with the knowledge to respond effectively in emergencies.

    Training Staff on First-Aid Procedures

    In this section, we delve into the pivotal role of training staff on first-aid procedures, a critical step in leveraging the full potential of first-aid posters in the workplace. Proper training equips employees with the necessary skills to respond to emergencies and fosters a safe and responsive work environment.

    Let us explore the avenues through which training can be imparted effectively, ensuring that the staff can utilise the information provided on the first-aid posters to its fullest extent.

    Regular Training Sessions

    The commitment to regular training sessions is at the heart of a robust safety culture. These sessions are designed to be a continuous learning journey where new staff members are introduced to the safety protocols during their inductions. It is a practice grounded in the belief that safety is everyone’s responsibility and that being well-acquainted with first-aid procedures is non-negotiable.

    A significant aspect of these sessions is the utilisation of first-aid posters as visual aids. These posters serve as a constant reminder, encouraging staff to engage actively with the material and fostering an environment where questions are welcomed. It is a dynamic and interactive approach that ensures the information is disseminated, understood, and retained.

    Refresher courses play a vital role in this learning ecosystem. They are structured to revisit the essential first-aid procedures periodically, ensuring that the knowledge remains fresh and top-of-mind. It is a proactive approach to safety, where learning is seen as a continuous journey, and the staff is encouraged to be vigilant at all times.

    Simulated Emergency Scenarios

    Beyond the regular training sessions, simulated emergency scenarios stand as a testament to a company’s dedication to safety. These drills are designed to mimic real-life emergencies, providing a safe space for employees to practise their responses to various situations.

    The first-aid posters come to life during these drills, serving as a guide and a reference point, encouraging staff to demonstrate their understanding practically. It is a hands-on approach to learning, where feedback is given and areas for improvement are highlighted, fostering a culture of continuous improvement.

    Recognition and rewards for effective responses are integral to this learning process. It reinforces learning and builds a sense of pride and responsibility among the staff. It is a strategy that goes beyond just imparting knowledge; it builds a community of individuals who are prepared, responsive, and committed to ensuring safety in the workplace.

    Training staff on first-aid procedures is not just a regulatory requirement but a moral imperative. It is about building a culture where safety is not just a poster on the wall but a lived reality, a commitment to each other’s well-being, and a testament to the value the organisation places on every individual’s safety and health.

    It is a journey of learning, practice, and continuous improvement, where every day is an opportunity to learn and to be safer than yesterday.

    Promoting a Culture of Safety

    In the workplace, fostering a culture of safety is paramount, and one effective way to achieve this is through the strategic use of first-aid posters. These posters serve as a vital tool during emergencies and play a crucial role in nurturing a safety-conscious environment.

    Let us delve deeper into how these posters can be utilised to promote a culture of safety in the workplace.

    Constant Reminders

    Having Safety Instructions Visibly Displayed Serves as a Constant Reminder for Employees

    Having first-aid posters prominently displayed in various workplace areas is a constant reminder for employees. These visual aids reinforce the importance of safety and ensure that individuals are continually reminded of the protocols to follow in case of an emergency. The posters can detail procedures for responding to different situations, such as choking incidents, which can be life-saving.

    Furthermore, the posters can be customised to address specific hazards present in the particular workplace, thereby providing relevant and practical guidance. This constant visual reminder helps ingrain safety measures in the employees’ minds, making it second nature for them to act correctly and promptly during emergencies.

    The More Familiar Staff Are with These Procedures, the More Likely They Are to Act Correctly in an Emergency

    Familiarity with first-aid procedures is not just about having knowledge; it is about building a reflex that could potentially save lives. The more the staff are acquainted with the information on the first-aid posters, the more adept they become at responding to emergencies correctly and efficiently.

    Employers in the UK are encouraged to undertake a first-aid needs assessment to understand their workplace’s specific requirements better. This assessment considers various factors, including the work’s nature, the workforce’s size, and potential hazards and risks. Based on this, employers can determine the appropriate first-aid provisions to implement, including deploying mental health first-aiders to address mental health issues in the workplace.

    By ensuring that employees are familiar with the procedures outlined in the first-aid posters, employers foster a workplace where individuals are not just equipped to handle physical emergencies but are also sensitive to the mental well-being of their colleagues, thereby promoting a holistic approach to safety.

    Employee Engagement

    Encourage Employees to Take Part in Regular Safety Briefings and Discussions

    Engaging employees in regular safety briefings and discussions is pivotal in promoting a safety culture. These sessions provide a platform for employees to learn, understand, and discuss the various safety protocols, including those outlined in the first-aid posters.

    Moreover, these briefings can be a forum where employees are encouraged to share personal experiences and insights, fostering a collaborative approach to safety. Through such engagements, employees can be educated on the latest safety practices, including identifying and managing mental health issues, a critical aspect of workplace safety that has gained prominence recently.

    Make Sure Everyone Understands the Importance of the Information on the Posters

    Understanding the gravity of the information displayed on the first-aid posters is essential. Employers should take the initiative to ensure that every staff member comprehends these posters’ vital role in fostering a safe working environment.

    This understanding goes beyond just knowing the procedures; it extends to appreciating the rationale behind each guideline and its potential impact in averting disasters and saving lives. Employers should, therefore, facilitate training sessions where experts can elucidate the information on the posters, ensuring a deep-seated understanding and respect for the safety protocols outlined therein.

    Encourage Questions and Suggestions to Improve Safety Practices

    Creating a culture where employees feel free to ask questions and offer suggestions regarding safety practices is vital. It fosters a sense of ownership and responsibility among the staff, encouraging them to be proactive in enhancing safety in the workplace.

    Encouraging questions allows for the clarification of any ambiguities, ensuring that everyone is on the same page regarding safety procedures. Moreover, suggestions from employees can provide fresh perspectives and innovative solutions to improve safety measures, creating a safe workplace that is adaptive to the evolving needs and dynamics of its environment.

    First-aid posters are not just informational tools; they are a cornerstone in building a culture of safety in the workplace. By promoting constant reminders and encouraging employee engagement, employers can create a work environment where safety is a priority and a value ingrained in every individual.

    Conclusion

    In conclusion, first-aid posters play a pivotal role in promoting workplace safety. They provide crucial information during emergencies and serve as a daily reminder of safety procedures. For health and safety officers and HR managers, they are an indispensable tool in maintaining a safe and well-informed workforce.

    If you have any further queries or require advice on first-aid posters, please do not hesitate to contact us.

  • Vehicle Security Signs – What Do You Need To Know?

    Vehicle Security Signs – What Do You Need To Know?

    For many businesses, the vehicles they have on-site or used by their employees are incredibly important. Perhaps they help staff members get to office space, ensuring productivity can be maintained regardless of location. Perhaps they help goods be delivered to the end customer while continuing the high levels of customer service your brand has become known for. Or, maybe they help your trained engineers get to each of their jobs quickly and efficiently. Whatever role vehicles play in your business, it is important to take their safety and security into consideration when opting for on-site signs. In this guide, we’ll cover what you need to know when choosing the right Vehicle Safety Sign for your business.

    What Are Vehicle Security Signs?

    As the name suggests, vehicle security signs are used to reduce the risk of theft or damage on vehicles. Under ISO 7010, they are designed to be highly visible with strongly contrasting colours and information that can be easily read. If your business is reliant on vehicles in any way, shape or form, they should be a consideration within your safety measures.

    These signs are used to advise:

    • Whether a vehicle has been left empty overnight, to discourage break-ins
    • Potential thieves know that CCTV footage is in use within a certain vehicle
    • Police and law enforcement that a vehicle may have potentially been stolen
    • Employees or drivers not to leave any valuables inside the vehicle

    Our range of vehicle security signs is manufactured from self-adhesive vinyl and printed with a yellow and black design.

    Where Are They Used?

    Due to the information that they provide, vehicle security signs should be placed inside or on the vehicle itself. This ensures that the relevant information is available at all times – no matter where the vehicle has been placed or parked. Because of the highly contrasting colour pallet used, they remain visible in most lower light conditions. And, the simple text-based design ensures that information is not confusing.

    These signs are simple but can be highly effective. This is especially true when they are used alongside other security methods, including CCTV and additional floodlighting.

    Are They Mandatory?

    In the UK, there are certain safety signs required by law to keep a business compliant with current legislation. To date, vehicle security signs aren’t one of these. They are an optional solution for any corporate premises looking to optimise the safety of their vehicles overnight and when left unattended. While these signs aren’t mandatory, they are a cost-effective way to help reduce the risk of thefts and break-ins.

    How To Choose The Right Vehicle Security Sign For Your Business

    Before selecting any safety sign for your business, you must carry out a risk assessment. This detailed analysis of your workplace should identify where risks and hazards are present. You can then take this information and work out what measures you can put in place to eliminate or significantly reduce the risk in question. This could mean swapping to new machinery, implementing a new process structure or – as in this instance – using safety signs.

    Before you purchase any vehicle safety signs, you need to perform a risk assessment. If the vehicles in your possession aren’t properly protected, it can cost your business significantly. Research from Verizon Connect reveals that fleet-based businesses lose out on an estimated £12,250 per year from stolen vehicles or equipment costs. Businesses with more than 100 vehicles could see these losses go as high as £21,000 in some situations. Lack of tracking or an inability to immobilise vehicles are two key reasons why many of these vehicles are never recovered. While you may not be in a position to invest in extreme tracking technology or added in-vehicle technology, safety signs exist as an effective deterrent.

    Different Types Of Vehicle Security Style

    Here at Lasting Impressions, we have several options available in this category. These include:

    Thankfully, the names of each of these signs are self-explanatory. Each one conveys a unique message that can be easily read by passers-by. Our signs come in two different sizes – 200 x 150mm and 300mm x 200mm so you can choose the most suitable option for your vehicle.

    Make sure that you position these signs in clear view for all to see. The ideal positioning would be on a clean and dry dashboard.

    How Can Lasting Impressions Help?

    We are industry experts and leaders in the design, manufacture and supply of quality safety signs for every business. Over the years, we have developed a keen understanding of the many different hazards and risks presented in different businesses. Our range of vehicle security signs has been designed through this experience to ensure that there are options for all vehicles and company types. Whether you have 10 vehicles in your fleet or 10,000, the right deterrent safety signs can reduce the risk of your most vital equipment being stolen or broken.

    All of our Vehicle Security Signs can be viewed online via our website, where you will also find a multitude of other safety signs for your business. We also have a Design A Sign service, giving you the flexibility to customise a design to fit your exacting needs. If you cannot find the sign you’re looking for, have a question or simply need to speak to a member of our team, please do get in contact here today.

  • Why Photoluminescent Fire Door Signs Are Crucial for Building Safety

    Why Photoluminescent Fire Door Signs Are Crucial for Building Safety

    This blog post delves into the importance of photoluminescent fire door signs and why they are crucial in ensuring building safety. Safety officers and facility managers will find this information particularly valuable, as these signs play a crucial role in maintaining a safe environment within any building.

    The Role of Photoluminescent Fire Door Signs

    Photoluminescent fire door signs are designed to guide occupants towards safe exit routes during an emergency, especially when visibility is low or power is lost. These signs are pivotal in working environments such as schools and offices, ensuring that every visitor understands where the nearest fire door is located. The signs comply with all current UK legislation, utilising simple imagery, clear font, and recognisable shapes to convey the necessary information effectively.

    What Are Photoluminescent Fire Door Signs?

    They are Signs that Glow in the Dark

    Photoluminescent fire door signs are not just ordinary signs; they have the distinctive feature of glowing in the dark, a characteristic that is achieved through a unique coating applied to them. This coating lets the signs absorb daylight from natural and artificial sources, charging them daily to emit a soft glow in low-light conditions or during power cuts. This feature ensures that the signs remain visible and the information readable, even in the most challenging conditions, thereby serving as a reliable guide towards safety.

    They are Charged by Exposure to Light

    The functionality of photoluminescent fire door signs is powered by their ability to charge through exposure to light. During the day, these signs absorb daylight, including natural and artificial light sources, storing energy later to emit a soft glow in the dark. This innovative technology ensures that the signs are self-sufficient, requiring no external power source to function, thus remaining operational and guiding individuals to the nearest fire door even in a power outage.

    They Stand Out, Even in Smoke-Filled Environments

    In the event of a fire, one of the significant challenges is the smoke that fills the environment, reducing visibility drastically. Photoluminescent fire door signs stand out even in smoke-filled environments, a vital feature guiding individuals safely during emergencies. The signs emit a soft glow that can pierce through the smoke, allowing the information on them to be read clearly and acting as a location pointer to direct individuals towards a fire door, enhancing safety during critical moments.

    They are Essential in Guiding Occupants to Safety During an Emergency

    Photoluminescent fire door signs are crucial in guiding occupants to safety during emergencies. These signs are designed with clear fonts and recognisable shapes, ensuring that everyone, including employees, customers, and the general public, can understand the information displayed clearly. Moreover, they are strategically installed onto or above doors, wherever the information is most clearly visible, to facilitate quick and safe evacuations during emergencies.

    Importance of Photoluminescent Fire Door Signs

    They Provide Clear, Visible Guidance Even in Power Outages

    One of the standout features of photoluminescent fire door signs is their ability to provide clear and visible guidance even during power outages. This is possible due to the unique coating that allows them to absorb and store energy from light, which is then used to emit a soft glow in the dark, ensuring that the signs remain functional and continue to guide individuals to safety even when there is no power.

    They Can Help Prevent Panic by Providing Clear Instructions

    In emergencies, clear instructions prevent panic and ensure a smooth evacuation process. Photoluminescent fire door signs are designed to offer clear instructions, helping to prevent panic by guiding individuals calmly and efficiently to the nearest exit points. The use of simple imagery and clear fonts in the design of these signs facilitates easy comprehension, aiding in maintaining order during evacuations.

    They are Durable and Long-Lasting

    Photoluminescent fire door signs are known for their durability and long-lasting nature. To suit various needs, they are available in different materials, including self-adhesive vinyl and 1.2mm photoluminescent plastic. Moreover, these signs have rounded corners for added safety and are designed to withstand the test of time, providing a long-term solution for safety signage in buildings.

    They are Easy to Install and Require Minimal Maintenance

    Ease of installation and minimal maintenance are other significant benefits of photoluminescent fire door signs. They can be installed quickly in various strategic locations throughout a workplace, ensuring safety is not compromised. Moreover, they require minimal maintenance, making them a cost-effective solution for safety signage while still complying with the relevant legislation, including EN ISO 7010:2012, to maintain a high safety standard in buildings.

    To sum up, photoluminescent fire door signs are crucial for building safety in the UK. These signs have unique features like glowing in the dark, being charged by light and remaining visible in smoke-filled areas. They guide people to safety during emergencies and provide clear guidance even when there is no power. These signs are durable, long-lasting, easy to install, and require minimal maintenance. They meet UK regulations and offer a reliable, cost-effective safety solution for different establishments.

    Therefore, safety officers and facility managers must integrate these signs into their safety protocols to uphold the highest safety and compliance standards.

    Compliance with Fire Safety Regulations

    Compliance with fire safety regulations is not just a legal necessity but a moral one, ensuring the safety and well-being of all occupants within a building. Photoluminescent fire door signs are pivotal in guiding individuals safely in emergencies.

    In this section, we delve deep into the legal requisites surrounding fire door signs and how photoluminescent signs aid in achieving a higher level of compliance.

    Legal Requirements for Fire Door Signs

    They Must be Installed on All Fire Doors

    Ensuring that photoluminescent fire door signs are installed on all fire doors is not just a safety measure but a legal requirement in the UK.

    These signs assist in quickly identifying exit routes, helping save lives in the event of a fire. The installation should be done per the guidelines stipulated in the Approved Document B of the building regulations, continually updated to incorporate the latest safety measures.

    They Should be Clearly Visible at All Times

    Fire door signs must always be visible, facilitating quick and safe emergency evacuation. Photoluminescent signs are especially beneficial as they glow in the dark, ensuring visibility even in power outages. This characteristic is vital in maintaining a safe evacuation pathway, guiding individuals to safety even in the most adverse conditions.

    They Must Comply with Fire Safety Regulations

    Adherence to fire safety regulations is non-negotiable. Fire door signs must comply with the standards outlined in Approved Document B, a comprehensive guide detailing the fire safety measures to be implemented in buildings. It is essential to regularly review and update safety measures to align with the latest amendments to ensure the highest level of safety is maintained.

    Non-Compliance Can Lead to Severe Consequences

    Non-compliance with the regulations jeopardises safety and can lead to severe legal repercussions, including hefty fines and potential imprisonment. The facility managers and safety officers are responsible for ensuring compliance, safeguarding the lives of the occupants and protecting themselves from legal ramifications.

    Photoluminescent Signs and Compliance

    Fire Safety Regulations Recognise Them

    Photoluminescent signs are recognised and endorsed by the UK fire safety regulations (also included in the Approved Document B). Their glow-in-the-dark feature is a technological advancement and a safety enhancement, aiding quicker and safer evacuations and playing a crucial role in saving lives during emergencies.

    They Can Contribute to a Higher Level of Compliance

    Utilising photoluminescent signs can elevate the level of compliance with fire safety regulations. Their self-illuminating nature ensures they remain visible even in low light conditions, offering a higher degree of safety than regular signs. Incorporating these signs is a step towards a safer environment, meeting and exceeding the regulatory requirements.

    They Are Beneficial in Buildings of All Sizes and Types

    Photoluminescent signs are versatile and beneficial in buildings of all sizes and types, including residential homes, schools, colleges, and offices. Their universal applicability makes them a preferred choice for safety officers aiming to enhance safety measures, ensuring a safe and secure environment for all occupants.

    They Can Enhance the Overall Safety of Your Building

    Incorporating photoluminescent signs not only aids in compliance with the legal requirements but significantly enhances the overall safety of a building. Their luminescent nature ensures a safe passage during evacuations, reducing panic and confusion. By opting for these signs, you choose a path of enhanced safety, ensuring a secure environment for all.

    To recap, integrating photoluminescent fire door signs is not merely a regulatory requirement but a cornerstone in building safety in the UK.

    These signs, recognised and endorsed by the fire safety regulations encapsulated in the Approved Document B, offer a higher level of compliance, ensuring visibility even in low light conditions, thereby facilitating safer and quicker evacuations. Their applicability across various building types and sizes makes them an indispensable tool for facility managers and safety officers working tirelessly to safeguard lives.

    By adhering to the legal requisites and leveraging the benefits of photoluminescent signs, we foster a culture of compliance and a commitment to safety, securing a safer tomorrow for all.

    Types of Photoluminescent Fire Door Signs

    In building safety, photoluminescent fire door signs hold a pivotal role. These signs are not just mere indicators but a robust shield that aids in mitigating the devastating effects of a fire outbreak. Let’s delve deeper into the different types of these life-saving signs and understand their significance.

    Fire Door Keep Shut Signs

    These Signs Indicate That the Door Must Be Kept Closed

    Understanding the imperative role of fire door keep-shut signs is essential. These signs are designed to convey a clear message: the door must remain closed to prevent the potential spread of fire and smoke. By adhering to this simple yet crucial instruction, individuals can significantly reduce the risk of fire engulfing other areas, safeguarding lives and assets.

    They Help to Prevent the Spread of Fire and Smoke

    The primary function of these signs is to act as a barrier, helping to contain the fire and smoke within a confined space. This containment strategy is vital in slowing the fire’s progression, giving occupants more time to evacuate safely and the fire services more time to respond.

    They Should Be Placed on Both Sides of the Door

    Placement is vital when it comes to these signs. Installing them on both sides of the door ensures that the message is conveyed unequivocally to individuals, regardless of how they approach it. This strategic placement fosters a safer environment, promoting adherence to safety protocols during emergencies.

    They Must Be Clearly Visible at All Times

    Visibility is a non-negotiable factor for these signs. They must be conspicuous, allowing people to easily notice and adhere to the safety instructions, thereby playing a pivotal role in preventing the spread of fire and ensuring safety.

    Some Examples Include

    • Photoluminescent Fire Door Keep Shut Sign: This sign is designed to provide instructions and visual guidance to employees, customers, and the general public. It is charged by natural or artificial light and is available in three different sizes and two materials: photoluminescent self-adhesive vinyl and 1.2mm photoluminescent plastic. The sign complies with the current legislation, including EN ISO 7010:2012, ensuring it meets the necessary safety standards.
    • Photoluminescent Fire Door Keep Shut Sign (Portrait): This portrait-oriented sign serves to instruct and guide employees, customers, and the general public, enhancing safety through visual guidance. The photoluminescent feature of the sign allows it to be charged by both natural and artificial light. It is available in two sizes and can be acquired in photoluminescent self-adhesive vinyl or 1.2mm photoluminescent plastic. The sign adheres to the current legislation, including the EN ISO 7010:2012 standard, ensuring it meets the high safety benchmarks set by the authorities.
    • Photoluminescent Fire Door Keep Shut Sign (Landscape): This landscape-oriented sign is designed to offer instructions and visual guidance to a wide array of individuals, including employees, customers, and the general populace. It leverages photoluminescent technology, allowing it to be charged by artificial and natural light sources. The sign is available in two sizes and can be chosen in photoluminescent self-adhesive vinyl or 1.2mm photoluminescent plastic. Adhering to the EN ISO 7010:2012 standard, it meets the stringent safety requirements mandated by the current legislation.

    Automatic Fire Door Keep Clear Signs

    These Signs Indicate That the Area Around the Door Should Be Kept Clear

    Automatic fire door keep-clear signs are pivotal in ensuring that the vicinity of the door remains unobstructed. This facilitates the door’s smooth closure in emergencies, preventing any hindrance that could escalate the danger.

    They Allow the Door to Close Automatically in Case of Fire

    These signs work in tandem with automatic fire doors, facilitating their function to close automatically in the event of a fire. This automatic closure is a critical safety feature, helping to contain the fire and prevent it from spreading to other areas.

    They Should Be Placed Near the Door

    To function effectively, these signs should be strategically placed near the door, ensuring that the message to keep the area clear is visible to all occupants. This placement aids in fostering a culture of safety and preparedness in the building.

    They Should Be Clearly Visible to All Occupants

    Ensuring the clear visibility of these signs to all occupants is imperative. It ensures that the critical message of keeping the area clear is not missed, promoting safety and adherence to fire safety protocols.

    Some Examples Include

    • Photoluminescent Automatic Fire Door Keep Clear Sign: This sign is crafted to offer instructions and visual guidance to employees, customers, and the general public, promoting safety through clear visual cues. The sign is photoluminescent, which can be charged through natural or artificial light exposure. It is available in three different sizes and two material options: photoluminescent self-adhesive vinyl and 1.2mm photoluminescent plastic. Moreover, it complies with the EN ISO 7010:2012 standard, ensuring it meets the necessary safety regulations.
    • Photoluminescent Automatic Fire Door Keep Clear Sign (Portrait): This portrait sign is designed to offer instructions and visual guidance to employees, customers, and the general public, enhancing safety through clear visual cues. The sign leverages photoluminescent technology, allowing it to be charged by natural and artificial light. It is available in two sizes and can be chosen in photoluminescent self-adhesive vinyl or 1.2mm photoluminescent plastic. The sign complies with the EN ISO 7010:2012 standard, meeting safety regulations.
    • Photoluminescent Automatic Fire Door Keep Clear Sign (Landscape): This landscape sign is pivotal in providing instructions and visual guidance to employees, customers, and the general public, fostering a safe environment through clear visual cues. The sign is photoluminescent, which can be charged through exposure to natural and artificial light sources. It is available in two sizes and material options: photoluminescent self-adhesive vinyl and 1.2mm photoluminescent plastic. Moreover, it complies with the EN ISO 7010:2012 standard, ensuring it meets the necessary safety regulations.

    To conclude, photoluminescent fire door signs are more than just safety indicators; they are an essential tool in the proactive safety measures of any building.

    Adherence to the guidelines indicated on these signs can be the defining factor between safety and catastrophe. It is, therefore, paramount to install these signs and ensure they are clearly visible and placed strategically to foster a safe environment.

    Implementing Photoluminescent Fire Door Signs

    Implementing photoluminescent fire door signs is a pivotal step in ensuring the safety of a building’s occupants. These signs are designed to clearly indicate the exit points around a building, facilitating quick and safe evacuation during emergencies.

    The signs are crafted with simple imagery, clear fonts, and recognisable shapes, making them compliant with all current UK legislation. Moreover, they are designed to absorb daylight from natural and artificial sources, allowing them to glow softly in low-light conditions or during power cuts, thus ensuring visibility even in emergencies.

    Let’s delve deeper into the nuances of effectively implementing these signs.

    Effective Placement of Signs

    Signs Should be Placed at Eye Level for Maximum Visibility

    Placing the signs at eye level ensures they are easily noticeable, guiding individuals efficiently during emergencies. This strategic placement facilitates quick recognition of the signs, allowing individuals to find the nearest fire door without wasting precious time during an emergency.

    They Should be Installed on Every Fire Door

    Installing signs on every fire door is a safety measure and a compliance requirement with UK legislation. This ensures that every visitor, be it an employee or a customer, understands where the nearest fire door is located, enhancing safety during emergencies.

    Any Objects or Equipment Should Not Obstruct Them

    No objects or equipment must obstruct the view of these signs. An unobstructed view ensures that individuals can quickly identify the exit routes, which is crucial in emergencies where every second counts.

    Additional Signs May be Required Depending on the Building Layout

    Depending on the complexity of a building’s layout, additional signs might be necessary to guide individuals to the nearest exit points. It is essential to assess the building layout meticulously to determine the optimal number and placement of signs to ensure safety.

    Regular Maintenance of Signs

    Signs Should be Kept Clean and Undamaged

    Maintaining the cleanliness and integrity of the signs is vital. Clean and undamaged signs ensure that the photoluminescent properties are not compromised, allowing them to function optimally even in low-light conditions.

    They Should be Checked Regularly to Ensure They are Clearly Visible

    Regular checks are essential to ensure the signs are always clearly visible. This proactive approach ensures that any issues are identified and rectified promptly, maintaining a high level of safety in the building.

    Damaged or Faded Signs Should be Replaced Immediately

    Immediate replacement of damaged or faded signs is non-negotiable. This ensures that the signs effectively guide individuals to safety during emergencies, adhering to the UK safety regulations.

    Regular Inspections Will Ensure Compliance with Fire Safety Regulations

    Conducting regular inspections is a requisite to ensure compliance with fire safety regulations. These inspections help in maintaining the standard of safety in the building, ensuring that all signs are in good condition and placed correctly.

    The meticulous implementation and regular maintenance of photoluminescent fire door signs are non-negotiable aspects of ensuring building safety.

    Adherence to practical placement and maintenance guidelines ensures compliance with UK legislation and fosters a safe environment, safeguarding individuals against emergencies. It is a testament to a building management’s commitment to the safety and well-being of its occupants.

    The Benefits of Using Photoluminescent Fire Door Signs

    Photoluminescent fire door signs offer numerous benefits, enhancing the overall safety of your building. These signs are crucial to safety measures in various establishments and a cost-effective and reliable solution.

    Let us delve deeper into how these signs can be vital to your safety protocols.

    Increased Visibility in Low Light Conditions

    They glow in the dark, making them highly visible even in power outages.

    Photoluminescent signs are designed to absorb natural or ambient light and store it. In the event of sudden darkness, such as during a power outage, the signs release this stored light, allowing them to glow brightly and provide essential messages and wayfinding. This feature ensures they remain highly visible even in power outages, guiding individuals safely during emergencies.

    They provide a clear path to safety in smoky conditions.

    In smoky conditions, visibility can be significantly reduced, making it challenging to locate exit routes. Photoluminescent signs stand out in such scenarios, offering a clear path to safety. Their glow can penetrate smoky environments, helping to guide occupants to the nearest exits and potentially saving lives.

    They help occupants locate fire doors quickly and efficiently.

    In emergencies, every second counts. Photoluminescent signs facilitate the quick and efficient location of fire doors, aiding in swift evacuations. Their high visibility ensures that occupants can find fire doors without wasting precious time, a feature that is especially beneficial in high-rise buildings and underground structures.

    They can be a lifesaver in emergencies.

    Photoluminescent signs are pivotal in emergencies, guiding individuals to safety and potentially saving lives. Their reliability and the fact that they do not rely on electrical power make them a sensible choice for any business, ensuring that they function optimally even in the most critical situations, serving as lifesavers.

    Cost-effective and Durable

    They are a cost-effective solution as they do not require electricity.

    One of the standout benefits of photoluminescent signs is their cost-effectiveness. They do not require electricity to function, reducing operating expenses significantly. This feature reduces electricity costs and eliminates the need for batteries, making them an environmentally friendly option.

    They are made from durable materials, ensuring longevity.

    Photoluminescent signs are known for longevity, crafted from hard-wearing materials lasting up to 10 years. This durability ensures that they stand the test of time, providing a long-term, reliable, cost-effective solution compared to traditional signs that may require frequent replacements or repairs.

    They require minimal maintenance compared to traditional signs.

    Maintenance is a breeze with photoluminescent signs, as they require little to no upkeep. Their self-charging qualities and the absence of electrical components mean they are not prone to electrical failures, reducing the need for costly replacements and repairs and ensuring a long operational life.

    They offer a long-term solution for fire safety compliance.

    Adopting photoluminescent signs is a step towards long-term fire safety compliance. They meet the exact code requirements and standards as traditional or electrical safety signs, making them a compliant and acceptable alternative for safety signage. Moreover, they align with the standards in BS ISO 16069, ensuring they meet UK safety requirements.

    In summary, photoluminescent fire door signs are indispensable in enhancing building safety. Their increased visibility in low light conditions and their cost-effective and durable nature make them a must-have in every establishment.

    By opting for these signs, you ensure compliance with safety standards and foster a safer environment for all occupants.

    Conclusion

    In conclusion, photoluminescent fire door signs are crucial to building safety. They guide occupants towards safe exit routes during emergencies, comply with fire safety regulations, come in various types for different purposes, can be effectively implemented, and offer numerous benefits such as increased visibility and durability.

    Safety officers and facility managers must recognise their value and ensure they are appropriately installed and maintained in your buildings. Please contact us for more information on photoluminescent fire door signs and how they can enhance your building’s safety.

  • Playing It Safe: The Value of Multi-Hazard Construction Signs in Risk Management

    Playing It Safe: The Value of Multi-Hazard Construction Signs in Risk Management

    This blog post examines the critical role of multi-hazard construction signs in risk management.

    We explore the benefits these signs provide to construction sites specifically aimed at health and safety managers and construction workers. We will also discuss their role in safety communication and their legal obligations, highlighting the significance of these signs in ensuring a safe working environment.

    What Are Multi-Hazard Construction Signs?

    Multi-hazard construction signs are pivotal tools in construction safety, designed to communicate multiple safety warnings through a single sign. These signs are crafted to be highly visible and readable to ensure that the safety messages are conveyed clearly to all individuals on a construction site.

    Materials and Durability

    A significant aspect of these signs is the materials used in their creation. Predominantly, they are manufactured using durable materials such as self-adhesive vinyl or rigid plastic. The choice of such robust materials ensures that the signs can withstand harsh environmental conditions, thereby serving their purpose for a prolonged period without succumbing to wear and tear.

    Design and Visibility

    The design of multi-hazard construction signs is centred around high visibility and readability. This ensures that workers can quickly identify and understand the warnings depicted, facilitating a safer working environment. The signs are structured to consolidate multiple safety warnings, thereby providing comprehensive information at a glance.

    The Importance of Multi-Hazard Construction Signs

    In the dynamic environment of a construction site, multi-hazard construction signs stand as an indispensable tool in maintaining safety and operational efficiency. Their role extends beyond mere communication; they are a cornerstone in risk management strategies implemented on construction sites.

    Cost-Effectiveness

    One of the standout benefits of utilising multi-hazard construction signs is the cost-effectiveness they bring to the table. By consolidating multiple warnings into a single sign, they reduce the need for numerous individual signs, thereby saving costs while maintaining a high level of safety communication.

    Enhancing Safety Communication

    Safety communication is critical to any construction site; these signs are pivotal in enhancing it. They ensure that workers are constantly aware of all potential hazards in their vicinity, fostering a culture of safety and vigilance. This not only helps in reducing accidents but also ensures compliance with legal obligations pertaining to safety.

    Maintaining a Safe Working Environment

    The presence of multi-hazard construction signs goes a long way in maintaining a safe working environment. They constantly remind workers of the various hazards that can be encountered, encouraging them to adopt safe working practices. This proactive approach to safety helps reduce accidents and foster a safety culture.

    Understanding and leveraging the benefits of multi-hazard construction signs is essential in fostering a safe and efficient working environment. They facilitate effective safety communication and help adhere to legal obligations, proving to be a valuable asset in risk management strategies on construction sites.

    It is imperative to keep abreast of the latest developments in this field to ensure the optimal utilisation of these signs in maintaining safety standards.

    Legal Requirements for Multi-Hazard Construction Signs

    Staying abreast of the legal requirements governing the use of multi-hazard construction signs is paramount in the construction industry. The recent developments in UK legislation have brought about significant changes that affect the deployment and management of these signs to ensure safety in construction sites.

    Legal Obligations for Safety Signs

    Safety signs are crucial in averting accidents and fostering a secure environment in construction sites. The legal obligations surrounding these signs have been reinforced by introducing new regulations to enhance safety measures in higher-risk buildings (HRBs). The Building Safety Act 2022 and the Higher-Risk Buildings (Descriptions and Supplementary Provisions) Regulations 2023 have outlined the criteria for identifying HRBs, which include buildings that are 18 metres or seven storeys high or more and encompass two or more residential units.

    In this context, it is essential to note that the signs must be clear, visible, and understandable to communicate the potential hazards and safety instructions effectively. Moreover, these signs should be regularly maintained and replaced if necessary to ensure their efficacy in conveying safety messages. Non-compliance with these regulations can lead to legal penalties, emphasising the necessity to adhere to legal obligations diligently.

    Multi-Hazard Signs and Compliance

    Multi-hazard signs are pivotal in complying with the safety regulations stipulated for HRBs. These signs offer a comprehensive way to communicate safety information, contributing to higher safety compliance. Recognised and accepted by health and safety authorities, these signs are integral to meeting the legal standards in recent legislation.

    The Building Safety Regulator, formed under the Health and Safety Executive (HSE), mandates the registration of HRBs starting from April 2023. The registration process is facilitated through a Building Safety Campaign, guiding the Principal Accountable Person (PAP) in registering their building. It is imperative to identify whether a building falls under the HRB category and to ensure its registration by October 2023 to avoid legal repercussions.

    Multi-hazard signs are not merely safety communication tools but legally binding elements in construction sites. They play a vital role in helping sites comply with stringent safety regulations and fostering a safe and secure working environment. It is incumbent upon the health and safety managers and construction workers to familiarise themselves with the legal requirements and to adhere to them meticulously to uphold the safety standards and to avoid legal penalties.

    Types of Multi-Hazard Construction Signs

    In the ever-evolving landscape of the UK construction industry, multi-hazard construction signs continue to play a pivotal role in ensuring safety and compliance with the law. These signs are meticulously designed to convey various safety messages, encompassing warnings, mandatory instructions, and prohibitions.

    Let us delve deeper into the different types of multi-hazard construction signs prevalent in the industry today.

    Hazard Warning Signs

    Hazard warning signs are indispensable in alerting individuals to potential dangers in construction sites. These signs are characterised by a yellow background adorned with a black symbol, a design choice that ensures immediate recognition and clarity.

    In the UK, as of 2023, these signs have evolved to include symbols and yellow panels that detail the specific nature of the hazard, providing a comprehensive understanding of the risks involved. For instance, a sign warning against “High Voltage Cables” would articulate the severity of the risk, urging individuals to exercise caution to avoid fatal electric shocks.

    The placement of these signs is strategic, ensuring they are situated near the relevant hazards to foster a safe working environment. By doing so, they constantly remind workers and visitors alike, helping prevent accidents and injuries on site. Some example signs include:

    • Multi-Hazard Site Safety 5 Point Sign (Large Landscape): This sign serves as a comprehensive guide, outlining five critical safety points to be adhered to in a construction site. It is designed in a large landscape format to ensure visibility from a distance, thereby facilitating better adherence to safety norms.
    • Multi-Hazard Site Safety 6 Point Sign (Large Landscape): Enhancing safety communication further, this sign delineates six pivotal safety instructions. Its large landscape format ensures that the details are clearly visible, fostering a safer working environment by guiding individuals on the precautions to be taken.
    • Multi-Hazard Site Safety 8 Point Sign (Large Landscape): This sign is a testament to detailed safety communication, encompassing eight vital safety directives to follow on-site. The large landscape format ensures that each point is distinctly visible, encouraging adherence to safety protocols and reducing potential hazards.

    Prohibition Signs

    Prohibition signs are integral in delineating actions strictly forbidden in construction areas to maintain safety. These signs are easily identifiable by a red circle and a diagonal line traversing it, often accompanied by a red panel that outlines the prohibited action in white text.

    As we navigate through the safety protocols 2023, we find that these signs have become more detailed, guiding individuals towards safe routes while restricting access to unsafe paths. For example, a sign instructing “Pedestrians Please Use The Other Footpath” would indicate that a particular path is unsafe, steering pedestrians towards a safer route.

    These signs are strategically placed to be visible to all workers, ensuring that rules and regulations are meticulously followed, fostering a safe and secure construction site. Some other example signs include:

    • Multi-Hazard Site Safety Unauthorised Entry Sign: This sign plays a crucial role in restricting unauthorised entries into specific construction site areas, thereby mitigating risks associated with unauthorised access and ensuring the safety of all personnel on-site.
    • Multi-Hazard Site Safety No Unauthorised Access Sign: This sign demarcates areas where unauthorised personnel are not allowed, thereby playing a pivotal role in maintaining the security and safety standards on the construction site and amplifying the message of restricted access.
    • Multi-Hazard Site Safety Do Not Exceed Speed Limit Sign: This sign is instrumental in regulating the speed of vehicles within the construction site. Urging drivers not to exceed the stipulated speed limit ensures a safe and controlled environment, reducing the risks of accidents due to overspeeding.

    Understanding and distinguishing between hazard warning and prohibition signs is vital in safely navigating a construction site’s complex environment. These signs, refined over the years to offer clear and concise safety messages, are pivotal in ensuring a safe working environment, playing a crucial role in risk management.

    Health and safety managers and construction workers must familiarise themselves with these signs to uphold safety standards and legal obligations.

    Implementing Multi-Hazard Construction Signs

    Proper implementation of multi-hazard construction signs is crucial for their effectiveness in ensuring safety and compliance on construction sites. It is essential to approach this task with a meticulous strategy encompassing the placement and maintenance of these signs to foster a secure working environment.

    Effective Placement of Signs

    Placing multi-hazard construction signs is a pivotal aspect of risk management on construction sites. These signs must be situated where they can be easily spotted to convey urgent information swiftly. Installing them at eye level enhances their visibility, ensuring they capture every individual’s attention on site.

    Moreover, it is vital to avoid any obstructions that might hinder the visibility of these signs. This means steering clear of placing them behind other objects or signs that could obscure them. For more significant sites, deploying multiple signs to guarantee safety messages are conveyed across the expansive area becomes necessary.

    Regular Maintenance of Signs

    Maintaining the multi-hazard construction signs is equally important to ensure their longevity and functionality. Keeping these signs clean and undamaged is a prerequisite to preserving their readability and effectiveness in conveying safety instructions.

    A regular check on the condition of these signs is essential to ascertain that they remain visible and readable at all times. This involves immediately replacing damaged or faded signs to maintain a high safety standard on the construction site. Moreover, regular inspections facilitate compliance with safety regulations, ensuring the site adheres to the legal obligations of safety signage.

    By embracing a proactive approach to maintaining these signs, one can foster a culture of safety and awareness, which is instrumental in preventing accidents and ensuring the well-being of all individuals on the construction site.

    The Role of Multi-Hazard Signs in Risk Communication

    Effective risk communication is pivotal in maintaining safety in construction sites, and multi-hazard signs are at the heart of this process. These signs are designed to succinctly convey critical safety information to prevent accidents and foster a safety culture.

    Let’s investigate how these signs facilitate clear safety messages and promote a safety culture.

    Delivering Clear Safety Messages

    Multi-hazard signs are instrumental in delivering clear safety messages, a role that has remained steadfast over the years. These signs distil complex safety information into easily understandable symbols and text, instantly recognising potential hazards. This immediate recognition is vital as it facilitates quick decision-making in potentially dangerous situations, reducing the likelihood of accidents and injuries.

    These signs bridge language barriers by offering a universal language of symbols, ensuring every worker can understand the safety messages conveyed, regardless of their linguistic background. This universality is crucial in diverse work environments, fostering inclusivity while maintaining safety standards.

    Promoting Safety Culture

    Promoting a safety culture goes beyond just following rules; it is about cultivating a mindset where safety is a priority. Multi-hazard signs serve as constant reminders of safety protocols, helping to foster a safety-first mentality among workers. These signs encourage compliance with safety rules and regulations, creating a safer and more productive working environment.

    Moreover, these signs play a pivotal role in nurturing a sense of responsibility among workers, encouraging them to be vigilant and to look out for not only their safety but also the safety of their colleagues. This collaborative approach to safety ensures a harmonious and secure working environment where everyone is a safety custodian.

    Multi-hazard signs are more than just tools for conveying safety information; they are a cornerstone in building and promoting a safety culture in construction sites. By delivering clear safety messages and fostering a safety culture, these signs play an indispensable role in risk communication, helping to safeguard lives and foster a productive working environment.

    Therefore, health and safety managers and construction workers must fully utilise these signs to enhance site safety.

    The Design and Durability of Multi-Hazard Signs

    The design and durability of multi-hazard signs are vital factors that contribute to their effectiveness and longevity.

    These signs are pivotal in ensuring safety in various environments, including construction sites. Their design focuses on visibility and comprehension, while their build quality guarantees durability for long-term use.

    Let’s delve deeper into these aspects.

    Designing for Visibility and Comprehension

    The emphasis on multi-hazard signs is significantly placed on designing obvious signs even from a distance. This is achieved by incorporating universally recognised symbols that facilitate easy comprehension. Using bold colours and clear text is a standard practice in the design process, ensuring quick recognition of the signs.

    Moreover, these signs are crafted to withstand harsh weather conditions and rough handling, a testament to the meticulous design process prioritising durability alongside visibility and comprehension. This ensures that the signs remain functional and continue to guide individuals correctly, even in adverse conditions, thereby playing a crucial role in risk management.

    Ensuring Durability for Long-Term Use

    When it comes to the construction of multi-hazard signs, robust materials such as self-adhesive vinyl or rigid plastic are the go-to choices. These materials are known for their resistance to fading, wear, and tear, ensuring the signs remain visible over a considerable period.

    Furthermore, these signs are built to withstand the rigours of the construction environment, a testament to their durability and longevity. This ensures safety and offers excellent value for money, as they do not require frequent replacements, thereby being a cost-effective solution in the long run.

    In safety and risk management, it is imperative to rely on multi-hazard signs that stand the test of time and continue to offer unmatched functionality through their superior design and build quality. Through this lens, we appreciate their value in fostering safe environments in construction sites or other hazard-prone areas.

    Training Workers on Multi-Hazard Signs

    Training workers to understand and follow the instructions on multi-hazard signs ensures their effectiveness. In the workplace, it is imperative to keep abreast of the latest developments in health and safety to foster a culture where everyone shares the responsibility for maintaining safety.

    The year 2023 has brought a renewed focus on mental and physical well-being, adapting to the nuances of hybrid working environments and encouraging regular breaks to prevent fatigue and stress, which can lead to severe consequences in hazardous settings.

    Importance of Safety Training

    Safety training is pivotal in helping workers comprehend the meanings behind different signs, facilitating an effective response to warnings, and significantly reducing the risk of accidents and injuries. It is essential to address both mental and physical well-being in safety training, considering the rise in work-related stress, anxiety, and depression in recent years.

    The Health and Safety Executive (HSE) reported that between 2021 and 2022, 914,000 workers suffered from work-related stress, anxiety, or depression. Therefore, fostering an environment where workers can openly discuss their mental health issues and receive the necessary support is vital.

    Incorporating Signage into Safety Training

    Incorporating signage into safety training involves: Providing a comprehensive overview of all signs used on the site. Educating workers on the specific risks associated with each sign. Offering regular refresher courses to keep them up-to-date with any new signs or changes. The training should also adapt to the hybrid working model prevalent in the UK, emphasising the careful handling of electrical equipment and the importance of promptly noticing and reporting potential hazards.

    Interactive training methods, such as quizzes or games, can make learning about signage more engaging and practical, ensuring a safe working environment in 2023 and beyond.

    Conclusion

    In conclusion, the value of multi-hazard construction signs in risk management cannot be overstated. They provide clear safety messages, promote a safety culture, are designed for visibility and durability, and play a crucial role in worker training. As health and safety managers and construction workers, understanding and utilising these signs is vital to maintaining a safe working environment.

    For more information on multi-hazard construction signs and how they can enhance your site’s safety, please contact us. We are here to help you create a safer and more productive work environment.

  • How to Properly Add Signage To Your Fire Equipment for Quick Response

    How to Properly Add Signage To Your Fire Equipment for Quick Response

    Ensuring the safety of a building’s occupants is paramount. As a safety officer or facility manager, your role includes guaranteeing that fire equipment is correctly signposted to allow for swift response in an emergency.

    This blog post outlines six critical aspects of implementing effective fire equipment signs.

    Understanding Fire Equipment Signs

    Fire equipment signs are vital navigational aids during emergencies, guiding individuals to the necessary equipment swiftly and efficiently. These signs are not merely decorative but crucial to a building’s safety infrastructure.

    Recognising Symbols

    Symbols on fire equipment signs are designed to be easily identifiable. They highlight the location and type of equipment available, ensuring that even in high-stress situations, individuals can quickly understand where to go and what to do.

    • Fire Extinguishers: The symbol for fire extinguishers usually consists of a simple yet distinct icon of an extinguisher. This universally recognised symbol is crucial for quick identification and response. For enhanced visibility, consider using a Fire Extinguisher Projecting Sign.
    • Fire Hoses: The fire hose symbol typically features a hose reel, making it instantly recognisable. This symbol is essential for guiding individuals to the hose in a fire emergency. A Fire Hose Reel Projecting Sign can make this equipment even more noticeable.
    • Fire Alarm Call Points: The fire alarm call points symbol is usually a hand pressing a button, indicating where the alarm can be activated. Quick identification of this symbol can be crucial in alerting the building’s occupants. Use a Fire Alarm Call Point Projecting Sign for better visibility.
    • Fire Escape Routes: The fire escape route symbol often features a running figure and an exit door, guiding individuals towards the safest exit path. This symbol is vital for ensuring a smooth evacuation process.

    Colour Coding

    The appropriate use of colours is crucial in creating noticeable and effective fire equipment signs. Colours attract attention and convey specific meanings that can aid in quick decision-making during emergencies.

    • Red Backgrounds: A red background is commonly used for fire equipment signs as it is universally associated with alertness and caution. Red is easily noticeable, even from a distance, making it an ideal choice.
    • White Text and Symbols: White text and symbols on a red background offer a stark contrast, making the sign easily readable. This colour combination is standard for fire equipment signs and quickly conveys information.
    • Use of Fluorescent Colours: Fluorescent colours can make the sign more visible in low-light conditions. However, these should be used sparingly and in the proper context to avoid causing confusion.
    • Avoiding Colour Clashes: Avoiding colour clashes that could make the sign difficult to read. For instance, using similar shades for the background and text can reduce the sign’s effectiveness.

    Understanding fire equipment signs’ symbols and colour coding ensures quick and effective responses during emergencies.

    The Correct Placement of Fire Equipment Signs

    The correct placement of fire equipment signs is crucial for their effectiveness in guiding individuals during emergencies. Properly positioned signs can distinguish between a well-coordinated evacuation and a chaotic situation.

    This section delves into the various factors that influence the placement of fire equipment signs, such as height, visibility, and proximity to the equipment they denote.

    Height and Visibility

    Eye Level Placement

    Placing fire equipment signs at eye level is generally considered the best practice for maximum visibility.

    At this height, individuals easily notice and read the signs, ensuring that crucial information is quickly and clearly communicated. This is particularly important in high-traffic areas where quick decision-making is essential.

    Higher Placement for Larger Spaces

    In larger spaces like warehouses or auditoriums, signs may need to be placed higher than eye level to ensure they are visible from a distance. Elevated placement allows the signs to be seen over obstacles and equipment, aiding in quicker identification and action during emergencies.

    Avoiding Obstructed Views

    It’s vital to ensure that any objects, furniture, or equipment do not obstruct the view of the sign. An obstructed sign defeats its purpose and could lead to confusion or delays during an emergency.

    Regular inspections should be conducted to ensure that new installations or rearrangements have not compromised the visibility of the signs.

    Considering Viewing Distances

    The size of the sign and the distance from which it can be viewed are also important factors. Larger signs may be necessary for areas where the viewing distance is greater. The text and symbols on the sign should be legible from the furthest point in the area it serves.

    Proximity to Equipment

    Directly Above Equipment

    Placing signs directly above the fire equipment ensures immediate identification. This is particularly useful for equipment like fire extinguishers that may be placed in cabinets or recesses. The sign serves as an immediate visual cue, directing individuals to the equipment’s exact location.

    On Equipment Cabinet Doors

    If fire equipment is stored in a cabinet, placing the sign on the cabinet door is effective. This makes it easier for individuals to quickly identify and access the equipment, especially in stressful situations where every second counts.

    On Nearby Walls

    Sometimes, placing a sign directly above the equipment or on a cabinet door may not be feasible. In such cases, placing the sign on a nearby wall can serve the purpose, provided it is within immediate visual range of the equipment it denotes.

    On Stand-Alone Posts if Necessary

    In open spaces where wall or ceiling mounting is not possible, stand-alone posts can be used to display fire equipment signs. These should be sturdy and tall enough to ensure the sign is visible from a distance.

    The correct placement of fire equipment signs is a nuanced process that requires careful consideration of various factors, including height, visibility, and proximity to the equipment. Adhering to these guidelines will contribute to a safer and more efficient response in emergencies.

    Choosing the Right Size and Material

    The size and material of your fire equipment signs are crucial factors that contribute to their effectiveness in an emergency. These elements determine not only the visibility but also the durability of the signs.

    Therefore, making informed decisions is essential when selecting the size and material for your fire equipment signs.

    Size Requirements

    Each fire equipment sign should be large enough to be easily readable from a distance. This ensures that in an emergency, individuals can quickly identify the location of fire equipment and take appropriate action.

    Large Symbols and Text

    When it comes to size, large symbols and text are indispensable. They catch the eye faster and can be seen from greater distances, aiding in quicker emergency response times. Large symbols and text make identifying the signs easier for people with vision impairments, making your building more inclusive.

    Proportional to the Space

    The size of the sign should also be proportional to the space where it is installed. A sign that is too large for a small room may overwhelm the space, while a sign that is too small for a large area may go unnoticed. Therefore, it’s crucial to consider the dimensions of the area where the sign will be placed.

    Visible from All Angles

    Visibility from all angles is another essential consideration. The sign should be positioned from multiple viewpoints within the space. This ensures the sign remains visible regardless of where someone stands or moves, facilitating quicker responses in emergencies.

    Consideration for Distant Viewing

    Additional considerations such as font type and contrast come into play for signs that need to be viewed from a distance. These elements should be optimised to ensure that the sign is easily readable even from far away, aiding in quick identification and action.

    Material Durability

    Durability is another critical factor, as signs should be made from materials that can withstand various environmental conditions, including heat, cold, and moisture exposure.

    Self-Adhesive Vinyl

    Self-adhesive vinyl is popular due to its ease of application and versatility. It adheres well to various surfaces and is resistant to moisture. However, it may not be the best choice for high-temperature areas as it can peel off over time.

    Rigid Plastic

    Rigid plastic signs are more durable, especially for outdoor or high-traffic areas. These signs are robust and lightweight, making them easy to install. They are also resistant to fading and can withstand exposure to various elements.

    Resistance to Fading

    Resistance to fading is crucial, especially for signs in areas exposed to direct sunlight. UV-resistant materials will maintain their colour and visibility for extended periods, ensuring that the sign remains effective over time.

    Fire-Resistant Materials

    Given that these are fire equipment signs, using fire-resistant materials is not just advisable but essential. These materials will not contribute to the spread of fire and will remain visible even in high-temperature conditions, aiding in emergency response.

    Choosing the right size and material for your fire equipment signs is critical in ensuring effective emergency response. Both visibility and durability are key factors that should guide your selection process.

    Compliance with Regulations

    Ensuring that fire equipment is correctly signposted is not just a matter of best practice; it’s a legal requirement. Compliance with regulations is crucial for building occupants’ safety and can also protect the facility manager or safety officer from potential legal repercussions.

    Understanding Regulatory Standards

    Understanding the standards set by regulatory bodies is the first step in ensuring compliance. The Health and Safety Executive (HSE) and the British Standards Institution (BSI) are two key organisations providing fire safety signage guidelines in the UK.

    Health and Safety Executive (HSE) Guidelines

    The Health and Safety Executive (HSE) is a UK government agency responsible for regulating and enforcing workplace health, safety, and welfare. The HSE has set guidelines under the Health and Safety (Safety Signs and Signals) Regulations 1996. These regulations were implemented to bring the EC Safety Signs Directive 92/58/EEC into UK law. The directive aims to standardise safety signs across European Union member states, ensuring signs have the same meaning wherever they are seen.

    The regulations cover various means of communicating health and safety information, including illuminated signs, hand and acoustic signals, and traditional sign boards such as prohibition and warning signs. Employers are required to provide specific safety signs whenever there is a risk that has not been avoided or controlled by other means. The regulations also require using road traffic signs within workplaces to regulate road traffic and mandate that employers maintain the safety signs they provide.

    British Standards Institution (BSI) Guidelines

    The British Standards Institution (BSI) is the national standards body of the United Kingdom. BSI provides guidelines for fire safety signs, including their design, installation, and maintenance. These guidelines are often more detailed than those provided by the HSE and may include specifications for materials, dimensions, and even the luminance of signs. Adhering to BSI standards can provide an additional layer of assurance that your fire safety signs meet the highest quality and effectiveness criteria.

    Local Fire Safety Regulations

    Local fire safety regulations can also significantly influence how fire equipment should be signposted. These regulations are often specific to the type of building, its usage, and the local authority jurisdiction. They may include requirements for the placement of signs, the frequency of inspections, and the qualifications of the persons responsible for these tasks. Ignoring local regulations can result in fines or legal action and compromise building occupants’ safety.

    Regular Updates on Regulations

    Staying updated on regulations is crucial as they can change over time. For instance, the Fire Safety (England) Regulations 2022 came into force on 23 January 2023, implementing the majority of the recommendations made by the Grenfell Tower Inquiry in its Phase 1 report. These new regulations have specific requirements for high-rise residential buildings and multi-occupied residential buildings, including the need for wayfinding signage visible in low-light conditions and regular checks on firefighting equipment.

    Compliance with regulations is not just a legal requirement but a moral obligation to ensure the safety of a building’s occupants. Understanding and adhering to guidelines from regulatory bodies like the HSE and BSI and local fire safety regulations is crucial for effective fire safety management.

    Maintaining Fire Equipment Signs

    Regular maintenance of fire equipment signs is crucial for ensuring their ongoing effectiveness. Over time, signs may suffer from wear and tear, fading, or other forms of damage that can compromise their visibility and readability.

    This section delves into the essential maintenance practices that can help keep your fire equipment signs in optimal condition.

    Routine Inspections

    Routine inspections are a vital part of maintaining fire equipment signs. These inspections should focus on assessing the physical condition of the signs, including checking for any visible damage, wear, or deterioration.

    It’s advisable to conduct these inspections at regular intervals, such as monthly or quarterly, to ensure that the signs remain in good condition and continue to serve their purpose effectively.

    Regular Cleaning

    Cleaning your fire equipment signs regularly is essential for maintaining visibility and readability.

    Dust, grime, and other contaminants can accumulate on the surface of the signs, making them less effective in guiding people during emergencies. Use a mild detergent and a soft cloth to clean the signs, avoiding abrasive materials that could scratch or damage the surface.

    This practice not only enhances the appearance of the signs but also prolongs their lifespan.

    Checking for Fading

    Over time, the colours and text on fire equipment signs can fade due to exposure to light and environmental factors.

    Fading compromises the effectiveness of the signs, making them less visible and harder to read. It’s crucial to check for signs of fading during your routine inspections and take corrective action, such as replacing the faded signs with new ones, to ensure they remain effective.

    Ensuring Secure Attachment

    The secure attachment of fire equipment signs is critical for their effectiveness. Loose or wobbly signs can fall off, get damaged, or become a hazard themselves.

    During your routine inspections, check the signs’ stability and mounting hardware. If any signs are loose or insecure, reattach them properly to ensure they stay in place and serve their intended purpose.

    Prompt Replacement of Damaged Signs

    If any signs are found to be damaged, faded, or otherwise compromised during your inspections, it’s crucial to replace them promptly. Damaged signs can mislead or confuse individuals during an emergency, leading to delayed response times and potentially worsening the situation.

    Always keep a stock of replacement signs on hand to facilitate quick replacements when needed. Regular maintenance practices like routine inspections, cleaning, and prompt replacement of damaged signs are essential for keeping your fire equipment signs in optimal condition. By adhering to these practices, you can ensure that your signs continue to serve their crucial role in guiding people during emergencies.

    Training and Awareness

    Ensuring that all occupants of your building understand the fire equipment signs is crucial to their effectiveness. A well-placed sign is only as good as its ability to communicate vital information. Therefore, training and awareness are key components in maximising the utility of your fire equipment signs.

    Staff Training

    It’s crucial to include signage information as part of your fire safety training. Staff should be well-versed in each sign’s meaning, location, and purpose.

    Explain The Different Symbols and Colours

    Understanding the different symbols and colours used in fire equipment signs is essential for a quick and effective response during an emergency.

    Symbols are generally designed to be simple and easily recognisable, even from a distance. For example, a fire extinguisher sign typically features a white pictogram on a red background. Red is universally associated with fire and danger, making it instantly recognisable.

    Similarly, green is used for safe condition signs, such as exit routes. The British Standard BS 5499 and the European Norm ISO EN 7010 regulate these symbols and colours to ensure consistency and effectiveness.

    Staff must be trained to recognise these symbols and colours, as they are designed to convey information rapidly without the need for text.

    Discuss the Placement of Signs and What They Indicate

    The placement of fire equipment signs is equally important.

    Signs should be installed at eye level and in locations where they are easily visible. They should not be obstructed by any objects or placed too high or low, as this can impede visibility. The signs should also be illuminated naturally or artificially to ensure they are visible in all conditions. The placement should be logical; for example, a fire extinguisher sign should be directly above the actual fire extinguisher.

    The British Standards Institution provides guidelines on the optimal placement of these signs to maximise their effectiveness.

    Conduct Regular Refresher Courses

    Regular refresher courses are essential to ensure staff remain familiar with the fire equipment signs and their meanings. These courses should be conducted annually and include practical exercises, such as identifying signs during a simulated fire drill. This hands-on approach ensures that staff can apply their knowledge in real-world scenarios, thereby enhancing the overall safety of the building.

    Include Sign Information in Your Fire Drill Practices

    Incorporating sign information into your fire drill practices is another effective way to reinforce staff training.

    During fire drills, staff should be tasked with identifying the nearest fire equipment and exit routes based on the signs. This tests their knowledge and helps them internalise the information, making it second nature during an emergency.

    Building Occupant Awareness

    Visitors, clients, and other non-staff members should also be able to understand your signs. These individuals may not have had the benefit of formal training, making it even more crucial that your signs are easily interpretable.

    Provide Guides or Handouts with Sign Information

    Providing guides or handouts that explain the various fire equipment signs can be an effective way to educate building occupants. These guides should be readily available in reception areas and should be included in welcome packets for new tenants or clients. They should contain clear explanations and illustrations of each sign, along with what action should be taken upon seeing them.

    Incorporate Sign Explanations into Safety Briefings

    Safety briefings offer another opportunity to educate building occupants about fire equipment signs. These briefings should be mandatory for all new occupants and should include a segment dedicated to explaining the signs. This ensures that everyone in the building, regardless of their role, has at least a basic understanding of what each sign means and what to do in an emergency.

    Post Clear Instructions Near Complex Signs

    Providing clear instructions nearby can benefit more complex or less intuitive signs. These instructions should be concise yet comprehensive, providing all the necessary information without overwhelming the reader. They should be placed close to the sign in question, ensuring that anyone needing additional clarification can easily find it.

    Use Universally Recognised Symbols Wherever Possible

    Using universally recognised symbols ensures that your signs are easily understood, even by non-English speakers. These symbols are designed to be intuitive and are regulated by international standards to ensure consistency. Using these symbols can significantly enhance the effectiveness of your fire equipment signs, making your building safer for everyone.

    Training and awareness are vital components in ensuring the effectiveness of your fire equipment signs. From staff training to building occupant awareness, each element plays a crucial role in enhancing the overall safety of your building.

    Signage Consistency

    Maintaining consistency in your fire equipment signage is crucial for aiding recognition and understanding. Consistency ensures that individuals can quickly identify and locate the necessary fire equipment in an emergency, enabling a swift and effective response.

    Consistent Design

    Keeping a uniform design across all signs is essential for immediate recognition. A consistent design language, including specific colours and symbols, helps individuals identify fire equipment signs quickly, reducing the time to respond in an emergency.

    Use Consistent Colours and Symbols

    Utilising a consistent colour scheme and set of symbols across all fire equipment signs is vital. For example, red is universally associated with fire equipment and should be prominently featured.

    Symbols like fire extinguishers or hoses should be standardised to avoid confusion. This uniformity in visual elements not only aids in quick identification but also minimises the risk of misunderstandings during high-pressure situations.

    Maintain a Similar Layout and Style for All Signs

    The layout and style of the signs should also be consistent. Whether it’s the positioning of text, the arrangement of symbols, or the overall design template, uniformity in these aspects ensures that individuals can quickly scan and interpret the signs, especially in stressful situations.

    Choose a Standard Size for All Similar Signs

    Selecting a standard size for all similar signs is another critical aspect of maintaining design consistency.

    A uniform size ensures that the signs are easily visible and identifiable, regardless of their location within the building. This standardisation also aids in creating a cohesive look and feel for all fire safety measures in the facility.

    Ensure Text Style and Size Are Uniform

    The text style and size used on the signs should be uniform to facilitate quick reading and comprehension. A standardised font and text size make it easier for individuals to read the signs from a distance, aiding in quick response times during emergencies.

    Consistent Placement

    Fire equipment signs should always be placed in expected, logical locations to ensure they are easily found when needed.

    Install Signs at Similar Heights Throughout the Building

    Installing signs at a consistent height throughout the building is crucial. This uniformity ensures that individuals instinctively know where to look for fire equipment signs, speeding up emergency response time.

    Always Place Signs Near the Equipment That They Denote

    Signs should always be placed in close proximity to the equipment they denote. This logical placement eliminates any guesswork in locating the fire equipment, allowing for a quicker and more effective response.

    Use Similar Placements for Similar Types of Equipment

    The signs should be placed in similar locations for similar types of fire equipment, such as extinguishers or hoses. This consistency in placement helps individuals quickly identify the type of equipment they need, especially in unfamiliar settings.

    Avoid Hidden or Unexpected Sign Locations

    It’s crucial to avoid placing signs in hidden or unexpected locations. Signs should be easily visible and not obstructed by any objects or placed in corners where they might be overlooked. Hidden or poorly placed signs can delay response times and compromise safety.

    Consistency in designing and placing fire equipment signs is essential for ensuring quick and effective responses in emergencies.

    Conclusion

    In conclusion, correctly implementing and maintaining fire equipment signs can significantly enhance the safety measures in your building. You can ensure a swift response in a fire emergency by understanding the signs, placing them correctly, choosing the right size and material, complying with regulations, maintaining them, and ensuring proper training and consistency.

    Don’t hesitate to contact us for further advice on fire equipment signage. Our team of experts is here to help you create a safer environment.

  • How to Enhance Worksite Safety with Multi-Hazard Scaffold Banners

    How to Enhance Worksite Safety with Multi-Hazard Scaffold Banners

    In the construction industry, safety is of paramount importance. This blog post is tailored for scaffolders and construction workers, focusing on the role of multi-hazard scaffold banners in enhancing worksite safety.
    Scaffold banners provide crucial information about potential hazards and guide workers and visitors around the site. Let’s delve into how these banners can boost safety levels at your worksite.

    Understanding the Role of Scaffold Banners

    Scaffold banners are not just pieces of fabric or PVC; they are essential tools for communicating safety information on construction sites. They serve as the first line of defence in preventing accidents and ensuring everyone on the site knows potential hazards.

    Importance of Scaffold Banners

    Highlighting Potential Hazards

    Scaffold banners are invaluable for highlighting potential hazards on a construction site. They can indicate areas where heavy machinery is in operation, where there might be a risk of falling objects, or where hazardous materials are stored. By clearly displaying this information, scaffold banners help minimise the risk of accidents, creating a safer work environment.

    Guiding Workers Around the Site

    Navigating a construction site can be complex. Scaffold banners assist in guiding workers and visitors around the site, showing them where it is safe to walk and where access is restricted. This is crucial for large sites where multiple activities may occur simultaneously.

    Indicating Work in Progress

    Scaffold banners can also indicate areas where work is in progress, which can be particularly useful for coordinating activities on a busy site. Knowing where work is happening helps to prevent accidental disruptions and allows for better planning and allocation of resources.

    Providing Emergency Contact Information

    In case of an emergency, it’s vital to have quick access to relevant contact information. Scaffold banners often include details such as the site manager’s contact number or the location of the nearest first aid station, providing a quick reference in urgent situations.

    Types of Scaffold Banners

    Multi-Hazard Banners

    Multi-hazard banners are designed to address various risks and safety requirements on a construction site. They are often colour-coded and use standard safety symbols to convey multiple pieces of information at a glance. Some example banners include:

    • Site Safety Scaffold Banner 1: This banner is made of high-quality PVC and is digitally printed with stitched hems. It complies with BS EN 7010 standards and is designed to identify dangers and minimise the risk of accidents. It is available in two sizes and features eye-catching colours—red, blue, and yellow—for optimal visibility.
    • Site Safety Scaffold Banner 2: Also made of durable PVC, this banner is perfect for various workplace settings. It is easy to install and remove, saving hours of work in higher-risk environments.
    • Site Safety Scaffold Banner 3: This banner is similar in design and material to the previous examples but offers another layout option that complies with BS EN7010 standards.
    • Site Safety Scaffold Banner 4: Designed to be both highly visible and robust, this banner comes with “Zone Danger” labels on each panel for added safety compliance.

    Site-Specific Banners

    Site-specific banners are tailored to a particular construction site’s unique hazards and conditions. They can be customised to include site-specific warnings, directions, or emergency contact information.

    Customised Banners

    Customised banners can be created for sites with unique or complex hazards to meet specific safety requirements. To convey precise information, these banners can include bespoke text, images, and safety symbols.

    Banners with Standard Safety Symbols

    These banners utilise universally recognised safety symbols to convey information quickly and clearly. They are beneficial for sites where workers may speak different languages.
    Scaffold banners play a critical role in enhancing safety on construction sites. They serve multiple functions, from highlighting potential hazards to providing emergency contact information, and come in various types to meet the specific needs of each site.

    Correct Placement of Scaffold Banners

    The location of your scaffold banners can significantly influence their effectiveness. Proper placement ensures the banners are easily visible and accessible, maximising their impact on worksite safety. The right location can differentiate between a well-informed team and a potential safety hazard.

    Visibility Considerations

    Banners should be placed where all site personnel can easily see them. The goal is to make the safety information as accessible as possible to everyone on site, from workers to site visitors. Visibility is the first step in the effective communication of safety protocols.

    At Eye Level Where Possible

    Placing banners at eye level is a highly effective strategy for ensuring they are immediately noticeable.
    At this height, the banners are within the natural line of sight for most individuals, making the safety messages more likely to be read and understood. This is particularly beneficial in busy construction environments where workers may be focused on their tasks and less likely to look up or down to read signs.
    The eye-level placement also facilitates quicker decision-making in emergencies, as the information is readily available.

    On Scaffolding at Each Floor Level

    Positioning banners on scaffolding at each floor level serves multiple purposes.

    • First, it ensures that workers at various heights are equally informed about potential hazards.
    • Secondly, it constantly reminds us at every stage of ascent or descent, reinforcing the importance of safety measures.

    This layered approach to information dissemination ensures that no one misses out on crucial safety instructions, regardless of their location on the scaffolding.

    At Site Entrances and Exits

    Placing banners at site entrances and exits serves as a welcome and farewell reminder of the safety protocols to be observed. It ensures that everyone entering or leaving the site knows the safety measures in place, setting the tone for a safety-conscious work environment. This strategic placement acts as a checkpoint for safety awareness, making it a non-negotiable aspect of site operations.

    Near High-Risk Areas

    High-risk areas, such as zones with heavy machinery or hazardous materials, should have banners placed nearby. This ensures that workers are immediately alerted to the specific dangers associated with these areas, allowing them to take appropriate precautions. The banners act as a last-minute safety net, providing critical information about where the highest risk is.

    Proximity to Hazards

    Banners should be strategically placed near the hazards they’re warning about. This ensures that workers are aware of the immediate risks and can take necessary precautions before interacting with these potentially dangerous items. The closer the banner is to the hazard, the more effective it will be in preventing accidents.

    Next to Hazardous Equipment or Materials

    Placing banners next to hazardous equipment or materials serves as an immediate warning to workers. This proximity ensures that the risk is acknowledged before any interaction with the equipment or material takes place. It’s a proactive approach to safety that minimises the chances of oversight or accidental mishandling.

    At the Top of Potentially Dangerous Areas

    Banners at the top of potentially dangerous areas, such as deep excavations or high platforms, serve as a final reminder of the risks involved. They act as a last line of defence, encouraging workers to exercise extreme caution in these zones. This placement is particularly effective because it captures attention at a critical moment, potentially averting a dangerous situation.

    In Areas Where Protective Equipment Is Required

    In zones where protective equipment is mandatory, banners should be prominently displayed. This reminds workers to equip themselves with the necessary safety gear before entering the area. Whether it’s hard hats, safety goggles, or other forms of personal protective equipment, the banner serves as a checkpoint for compliance.

    On or Near the Scaffolding Itself

    The scaffolding structure is an ideal location for banners, especially those related to the safe use of the scaffolding. Placing banners here ensures that the safety message is in the immediate vicinity of the activity it pertains to, making it hard to ignore.
    The strategic placement of scaffold banners is crucial for maximising their effectiveness. By considering both visibility and proximity to hazards, you can ensure that your banners effectively maintain a safe worksite.

    Choosing the Right Size and Material

    Selecting the appropriate sizes and materials for your multi-hazard scaffold banners is crucial for ensuring their durability and visibility. The right choices can significantly affect how effectively these banners convey safety messages to workers and visitors on the construction site.

    Size Requirements

    Your banners should be large enough for easy reading from a distance. This is essential for ensuring safety messages are accessible to everyone on the site.

    Large Enough to Be Seen from Across the Site

    When it comes to size, the banners should be large enough to be visible from various points across the construction site. This ensures that workers and visitors can easily identify potential hazards, even when they are far away from the banner. The dimensions should be such that the text and symbols are legible from at least 10 metres away, which is a standard distance for visibility in safety signage.

    Text and Symbols Should Be Legible

    The text and symbols on the banners must be legible and clear. The use of bold fonts and contrasting colours can aid in readability. The height of the letters should be at least 5 cm for optimal visibility, and the symbols should be universally understood to effectively convey the intended safety messages.

    Size May Depend on the Complexity of the Message

    The size of the banner may also depend on the complexity of the safety message it carries. For instance, a banner warning about multiple hazards may require more space to convey all necessary information adequately. Therefore, choosing a size that can accommodate the complexity of the safety messages you wish to display is advisable.

    Banners Should Not Obstruct the View or Movement

    While size is important, the banners mustn’t obstruct the view or impede the movement of workers and machinery. They should be placed at a height and location where they are easily visible but not in the way of daily operations.

    Material Durability

    Your banners should be made from materials that can withstand the harsh conditions commonly found on construction sites.

    Self-Adhesive Vinyl

    Self-adhesive vinyl is a popular choice for scaffold banners due to its durability and ease of application. This moisture-resistant material can adhere well to various surfaces, making it ideal for indoor and outdoor use.

    Rigid Plastic

    Rigid plastic is another excellent material for scaffold banners. It offers high durability and is resistant to impacts, making it suitable for more demanding environments. However, it may require additional fixtures for secure installation.

    Weather-Resistant Materials

    Using weather-resistant materials is essential for ensuring the longevity of your banners. These materials can withstand conditions such as rain, wind, and extreme temperatures, thereby maintaining the integrity of the safety messages displayed.

    UV-Protected for Fade Resistance

    UV-protected materials are crucial for preventing the fading of text and symbols on the banners. This ensures the safety messages remain clear and visible for an extended period, even when exposed to direct sunlight.
    The right size and material for your multi-hazard scaffold banners are vital factors in enhancing worksite safety. By considering these aspects carefully, you can ensure that your banners are effective and durable.

    Compliance with Regulations

    Ensuring that your scaffold banners are in compliance with all relevant safety regulations is not just a legal necessity but also a moral obligation to protect the lives of workers and visitors on the construction site. This section delves into the intricacies of understanding and adhering to various regulatory standards that govern the use of scaffold banners in the UK construction industry.

    Understanding Regulatory Standards

    Before you even think about installing a scaffold banner, it’s crucial to familiarise yourself with the standards set by regulatory bodies. These standards serve as a framework for what is acceptable and what is not, thereby helping you make informed decisions.

    Health and Safety Executive (HSE) Guidelines

    The Health and Safety Executive (HSE) is a UK government agency responsible for regulating and enforcing workplace health, safety, and welfare standards. According to HSE, scaffolds must be designed, erected, altered, and dismantled only by competent individuals under the supervision of a competent supervisor. The agency outlines several key issues to consider, such as general access scaffold requirements, guard rails, toe boards, and other barriers, scaffold design, and scaffold inspection. HSE also emphasises the importance of strength and stability calculations for scaffolding. If the scaffolding encroaches over the highway, a licence under Section 169 of the Highways Act 1980 is required, issued by the local Highway Authority.

    British Standards Institution (BSI) Guidelines

    The British Standards Institution (BSI) is another key body that sets standards for various industries, including construction. While BSI doesn’t specifically focus on scaffold banners, their guidelines on materials and workmanship can be applied to ensure that your banners are of high quality and meet safety standards. It’s essential to consult BSI standards when selecting materials for your scaffold banners to ensure they are durable, weather-resistant, and capable of withstanding the conditions they will be exposed to.

    Local Construction Safety Regulations

    Local councils may have additional regulations that you need to be aware of. These can include specific requirements for designing, placing, and maintaining scaffold banners. Always check with your local council to ensure you fully comply with local laws. Some councils may even provide a list of approved scaffolding contractors, making choosing a reliable service provider easier.

    Regular Updates on Regulations

    Regulatory standards are not set in stone; they are subject to change based on new research, technological advancements, and lessons learned from past incidents. Therefore, it’s crucial to stay updated on any changes to regulations that might affect your scaffold banners. Regularly consult the websites of regulatory bodies like HSE and BSI, and consider subscribing to newsletters or alerts that will notify you of any updates.
    Compliance with regulations is not just a checkbox to tick off; it’s a continuous process that requires vigilance, education, and proactive measures to ensure the safety of everyone involved.

    Maintaining Your Scaffold Banners

    Regularly maintaining your scaffold banners is essential for ensuring their effectiveness in conveying safety messages and hazard warnings. Proper care not only prolongs the lifespan of these banners but also maintains their visibility and readability, which are crucial for worksite safety.

    Routine Inspections

    Regularly inspecting your scaffold banners to check for any signs of damage or wear is imperative. These inspections should be thorough and include looking for tears, holes, or other physical damage that could compromise the banner’s integrity. Regular checks help in the early identification of issues, allowing for timely repairs or replacements.

    Regular Cleaning to Maintain Visibility

    Maintaining the visibility of your scaffold banners is crucial for effectively communicating safety messages. Dust, grime, and other environmental factors can significantly reduce visibility over time. Regular cleaning is therefore essential. Use a mild detergent and water for cleaning; harsh chemicals can damage the material and fade the print. Using a soft-bristle brush to gently scrub the surface gently is advisable, paying special attention to text and symbols. After cleaning, rinse thoroughly with clean water and allow the banner to air dry. This process enhances visibility and allows inspecting the banner for any hidden damages.

    Checking for Fading or Damage

    Fading is common with scaffold banners exposed to sunlight for extended periods. UV rays can degrade the ink used in printing, making the text and symbols less visible. Regular inspections should include checking for colour fading and print quality. If you notice significant fading, it’s time to replace the banner. Additionally, environmental factors like wind and rain can cause wear and tear. Look for frayed edges, holes, or signs of the material weakening. Such damages can compromise the banner’s effectiveness and should be addressed immediately.

    Ensuring Secure Attachment

    Securely attaching your scaffold banners is vital for safety and effectiveness. Loose or improperly attached banners can become hazards themselves, posing risks like tripping or falling. Use heavy-duty zip ties or industrial-grade fasteners for secure attachment. The fastening points should be evenly distributed to prevent the banner from sagging or flapping in the wind, which can reduce visibility and readability. Regularly check these attachment points during routine inspections to ensure they remain secure.

    Prompt Replacement of Worn-Out Banners

    Worn-out or damaged banners should be replaced promptly to maintain the highest level of safety communication. Keeping a stock of replacement banners is advisable so there is no delay in swapping out old for new. The replacement process should be as rigorous as the initial installation, ensuring secure attachment and optimal visibility.
    Regular maintenance, including cleaning and inspections, is crucial for the long-term effectiveness of your scaffold banners. By adhering to these guidelines, you can ensure that your banners continue to serve their purpose of enhancing worksite safety.

    Training and Awareness

    Ensuring that all site personnel understand the information displayed on scaffold banners is a cornerstone of worksite safety. Proper training and awareness are a regulatory requirement and a moral obligation to protect lives.

    Staff Training

    Incorporating banner information into your safety training regimen is essential. This ensures that your staff are aware of the hazards and understand how to navigate them.

    Explain Different Symbols and Colours

    Understanding the symbols and colours on scaffold banners is crucial for effectively communicating safety information.
    Symbols often used include the exclamation mark for general caution, a fire symbol for fire hazards, and a skull and crossbones for toxic materials. Colours also play a significant role; for instance, red is universally recognised for danger or stop, yellow for caution, and green for safe conditions or go.
    The British Standard BS 5499 governs the design of safety signs, including the use of symbols and colours. It is aligned with the ISO EN 7010 standards, ensuring international recognisability.

    Discuss the Placement and Purpose of Banners

    The placement of scaffold banners is as important as the information they convey. Banners should be placed at eye level and in locations where they are easily visible to everyone entering the site. They should be positioned near the hazards they are warning about but at a safe distance to allow for corrective action.
    The purpose of these banners is to provide immediate, easily digestible information to prevent accidents and guide both workers and visitors.

    Conduct Regular Refresher Courses

    Regular refresher courses are essential to ensure the staff’s current knowledge of the symbols and safety procedures. These courses should be conducted annually and include practical exercises that simulate real-world scenarios.
    The training should be updated to include any new symbols or safety procedures that have been introduced.

    Include Banner Information in Site Inductions

    Every new worker or subcontractor should be given a site induction that includes detailed explanations of the scaffold banners. This ensures that even those new to your site are immediately made aware of the safety protocols and what each banner symbol and colour signifies.

    Site Visitor Awareness

    It’s not just the site personnel who need to understand your banners; visitors should, too. Clear instructions and guides can help them navigate the site safely.

    Provide Guides or Handouts with Banner Information

    Printed guides or handouts explaining the symbols and colours on your scaffold banners can be invaluable for site visitors. These guides should be concise yet comprehensive, covering all the symbols used on your site.

    Incorporate Banner Explanations into Safety Briefings

    Every visitor should undergo a safety briefing that includes an explanation of the scaffold banners. This ensures that they are aware of the hazards they might encounter and how to avoid them.

    Post Clear Instructions Near Complex Banners

    Posting additional clear instructions nearby can be beneficial for banners that convey complex information or multiple hazards. These can be in the form of smaller signs or labels that provide a more detailed explanation of the banner.

    Use Universally Recognised Symbols Wherever Possible

    Using universally recognised symbols ensures that even visitors who may not speak the language can understand the safety instructions. This is particularly important in multicultural worksites where language can be a barrier.
    Adequate training and awareness of scaffold banners are integral to maintaining a safe worksite. Both staff and visitors should be well-informed about what each symbol and colour means and how to react accordingly.

    Customising Your Scaffold Banners

    Customising your scaffold banners is not merely an aesthetic choice but a strategic one that can significantly enhance the safety and efficiency of your worksite. By tailoring your banners to your site’s specific needs and conditions, you can ensure that they serve as effective tools for hazard communication and site navigation.

    Reflecting Site-Specific Hazards

    Your scaffold banners should be more than generic safety signs; they should accurately represent the hazards present on your site. This means that if your site has unique risks, such as chemical exposure or electrical hazards, these should be clearly indicated on your banners.

    Accurately Identify and Display All Potential Hazards

    Conducting a thorough risk assessment to identify all potential hazards on your site is crucial. Once identified, these hazards should be prominently displayed on your scaffold banners. This not only complies with health and safety regulations but also ensures that workers and visitors are fully aware of the risks they may encounter.

    Use Clear, Simple Language to Describe Risks

    While it might be tempting to use technical jargon, remember that not everyone on the site may be familiar with such terms. Use clear and straightforward language to describe risks. This ensures everyone, from skilled workers to occasional visitors, easily understands the message.

    Include Visual Representations of Hazards Where Possible

    Visual cues can be more immediate and impactful than text. Including pictograms or illustrations of the hazards can make it easier for people to quickly understand the risks, especially in high-stress situations where reading may be difficult.

    Regularly Update Banners to Reflect Changing Site Conditions

    Worksite conditions can change rapidly; your scaffold banners should reflect these changes. Regular updates are essential to ensure the banners remain relevant and communicate current hazards and safety protocols effectively.

    Including Site Information

    In addition to hazard warnings, your banners can serve as informational guides. They can provide essential details that enhance safety and operational efficiency.

    Display Site Map or Layout

    Including a simple site map or layout on your scaffold banners can help workers and visitors navigate the area more efficiently. This is particularly useful for large or complex sites where getting lost or taking a wrong turn can lead to safety risks.

    Indicate the Location of First Aid Stations or Emergency Equipment

    Knowing where to find first aid stations or emergency equipment can be crucial in a crisis. Clearly marking these locations on your banners can save valuable time when it matters most.

    Provide Contact Details for a Site Manager or Safety Officer

    In case of emergencies or uncertainties, it’s beneficial to have a go-to person for immediate assistance. Providing the contact details of a site manager or safety officer can facilitate quicker resolution of issues.

    Highlight Restricted Areas or No-Go Zones

    Certain areas on the worksite may be off-limits due to high risks or sensitive operations. Clearly marking these as restricted areas or no-go zones on your banners can prevent unauthorised access and potential accidents.
    Customising your scaffold banners is an effective strategy for enhancing worksite safety. By being specific and up-to-date, these banners can serve as invaluable tools for risk communication and site navigation.

    Effective Use of Colour and Symbols

    The use of colour and symbols on multi-hazard scaffold banners is not merely a design choice; it’s a strategic decision that can significantly enhance the readability and comprehension of your banners.
    You can make your banners more effective and intuitive by employing a well-thought-out colour scheme and universally recognised symbols.

    Colour Coding for Different Hazards

    Different colours can be used to signify different types of hazards. For example, red could indicate fire hazards, while blue could signify water-related risks. This intuitive approach allows workers and visitors to identify the type of hazard they might encounter quickly.

    Use a Consistent Colour Scheme Across All Banners

    Consistency is key when it comes to colour coding. Using a consistent colour scheme across all banners ensures that there is no confusion.
    For instance, if red is used for fire hazards on one banner, it should be used for the same purpose on all other banners. This uniformity aids in quick recognition and response, thereby enhancing safety.

    Follow Standard Colour Coding Practices

    It’s advisable to follow standard colour coding practices, such as red for fire hazards and green for first aid. These standards are often aligned with ISO EN 7010, which is internationally recognised. Adhering to these standards makes your banners more intuitive and complies with safety regulations.

    Ensure Colours Are Bright and Easily Distinguishable

    The colours used should be bright and easily distinguishable from one another. This is crucial in ensuring the banners are visible from a distance and in varying light conditions. Faded or similar-looking colours can lead to misunderstandings, which could be dangerous in a worksite environment.

    Avoid Using Too Many Colours on a Single Banner

    While making your banners colourful and eye-catching might be tempting, using too many colours can be counterproductive. An overload of colours can make the banner confusing and hard to read, defeating the purpose of quick and effective communication.

    Using Recognisable Safety Symbols

    Symbols are another effective way to convey important safety information. The brain can process them quickly, making them ideal for high-risk environments like construction sites.

    Use Internationally Recognised Safety Symbols

    Using internationally recognised safety symbols is crucial for ensuring that a diverse workforce understands your banners.
    These symbols are designed based on extensive research and are universally accepted. For example, a symbol of a fire is universally understood to signify a fire hazard, while a cross symbolises medical aid. These symbols are often standardised under ISO 3864 and ISO 7010, ensuring they meet rigorous safety and comprehensibility standards.
    Using these symbols ensures that your banners are effective and compliant with international safety standards.

    Ensure Symbols Are Large and Clear

    The size of the symbols used should be large enough to be easily seen from a distance. Small or intricate designs can be hard to decipher, especially in a busy or cluttered environment. Therefore, opt for symbols that are simple, large, and clear.

    Pair Symbols with Text for Clarity

    While symbols are effective, pairing them with text can eliminate any ambiguity. For example, a symbol indicating a fall hazard can be accompanied by the text “Caution: Fall Hazard” to clarify the message.

    Regularly Update Staff and Visitors on Symbol Meanings

    Even with the use of internationally recognised symbols, it’s essential to regularly update staff and visitors about what these symbols mean. This can be done through safety briefings or informational pamphlets distributed at the worksite.
    The effective use of colour and symbols in multi-hazard scaffold banners is an essential aspect of worksite safety. By adhering to best practices and international standards, you can create visually appealing banners that are highly functional in conveying critical safety information.

    Conclusion

    In conclusion, multi-hazard scaffold banners are essential in maintaining safety on construction sites. By customising your banners, effectively using colour and symbols, and following the other guidelines outlined in this post, you can significantly enhance the safety and efficiency of your worksite.
    Don’t hesitate to contact us for further guidance on creating effective multi-hazard scaffold banners. Our team of experts is here to help you ensure the highest levels of safety at your worksite.